How to Restore the Default Fonts in Windows 7 OR Remove Custom Fonts
Hi friends, in this tutorial i will let you guys How to Restore the Default Fonts in Windows 7 OR Remove Custom Fonts. We have two approach to achieve this.I will describe you one by one.
Approach 1:
1. Click On START > CONTROL PANEL > APPEARANCE AND PERSONALIZATION.
2. Now click on FONTS.
3. Here you see all the fonts you have installed on your system.
4. Now select any one, and then press delete. Here you have to delete one by one, and this make it a long process, if you have a long list of custom fonts.
This approach (APPROACH 1) was not worked with me, i have 22189 fonts installed and in fonts directory it is showing 0 fonts.
Approach 2:
1. Search and download the Software FontFrenzy, its free.
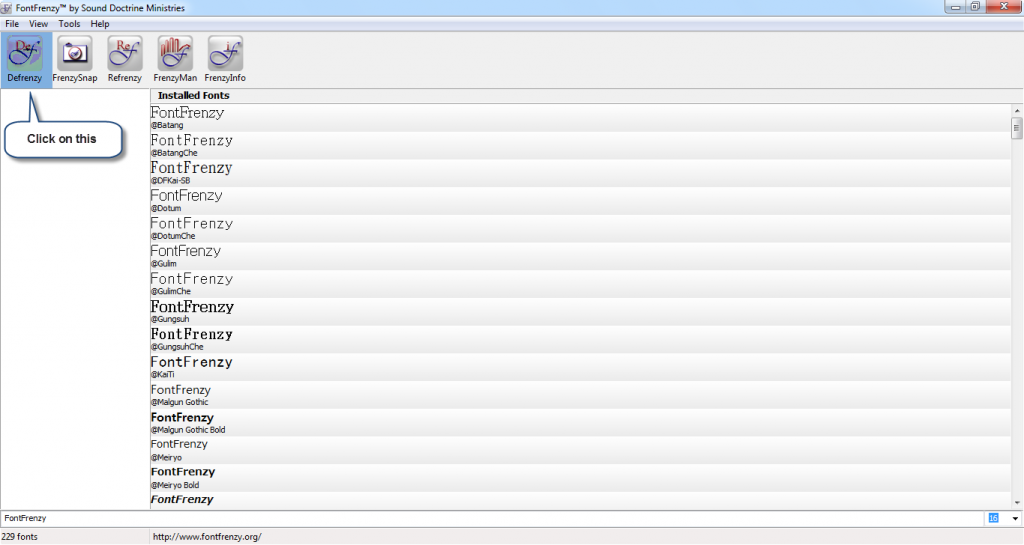
2. After installation run this software, on main screen it will show you total numbers of fonts you have installed.
3. Now to uninstall all custom fonts you have installed at once, click on DEFRENZY button.
4. It will ask you for confirmation, click on OK & Enjoy…..

