Active Directory Windows Server 2012
Hi friends in this post we will learn how to install active directory, Active Directory Windows Server 2012, or you can say how to install active directory in windows server 2012.
Active Directory installation have 2 part:
Part 1: Install Active Directory
Part 2: Promote server as domain controller
Part 1 – (Install Active Directory):
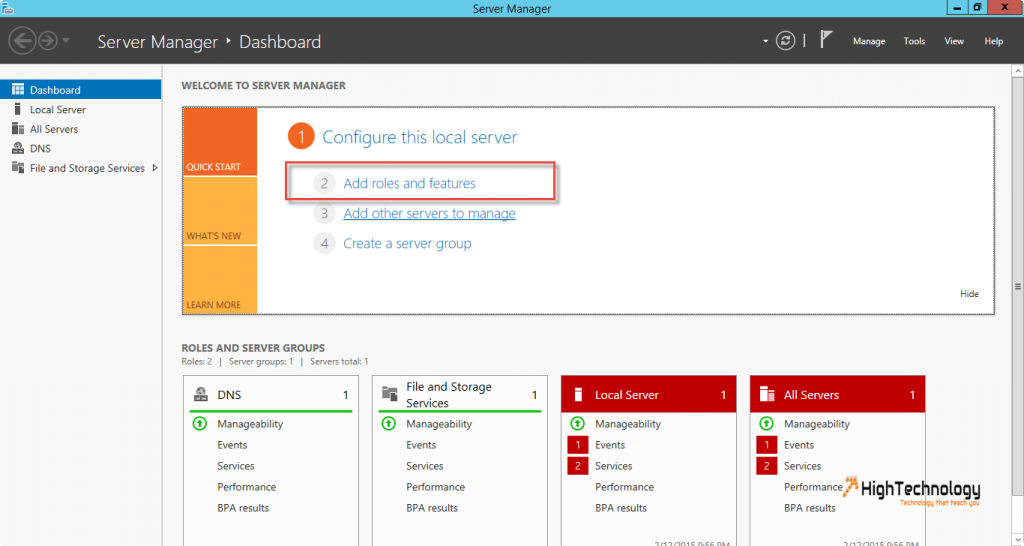
1. Go to Server manager, Click on Add roles and features.
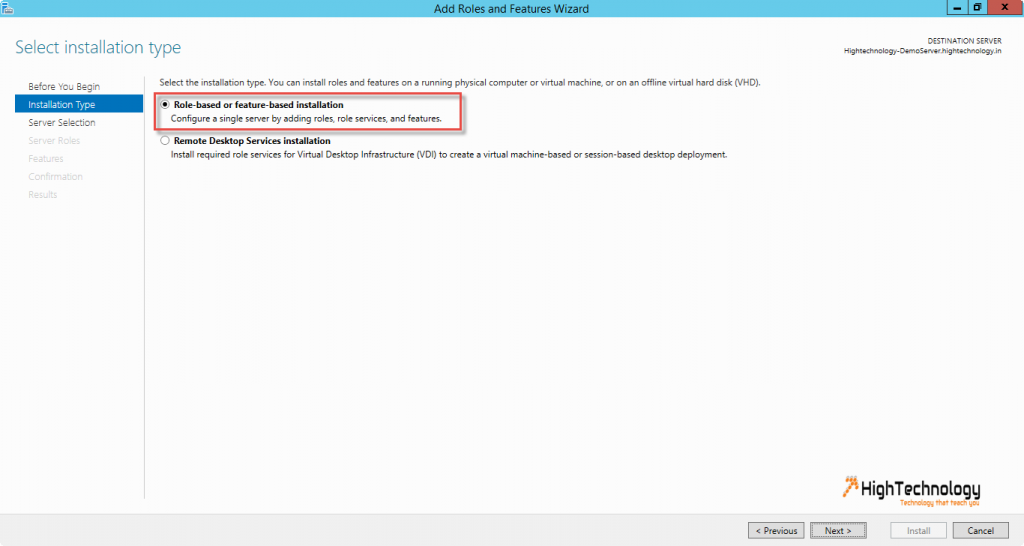
2. on Installation type window, we have to select role-based or feature-based installation, and click on NEXT.
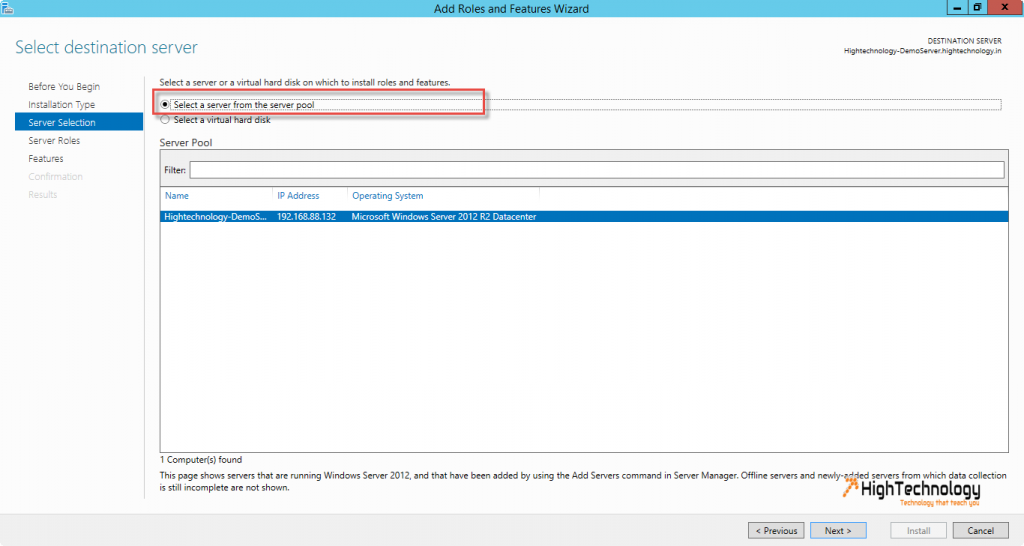
3. On Select destination server window, select your local system, click on NEXT.
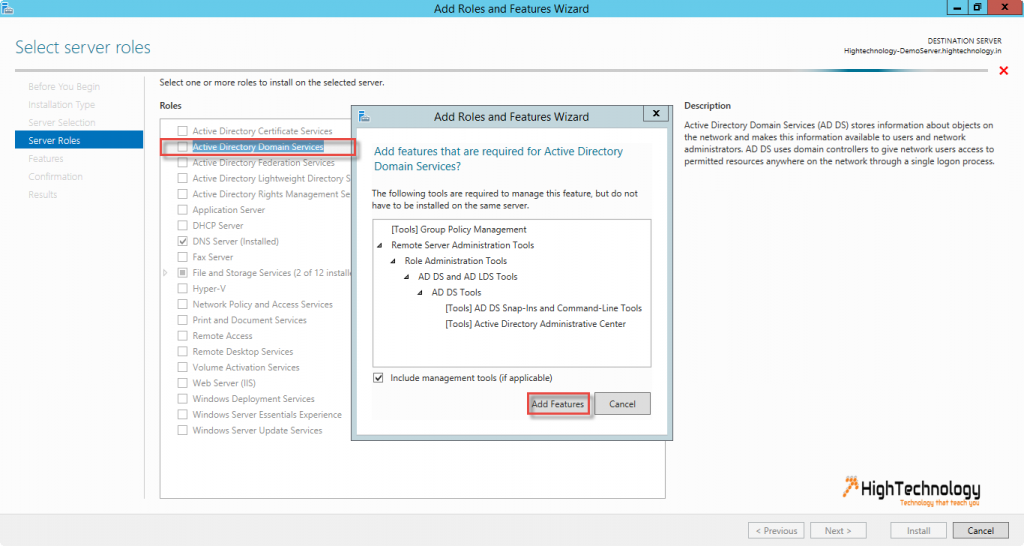
4. On Server Role window, select Active Directory Domain Services > a pop up will open, click on Add Features, click on NEXT > NEXT > NEXT.
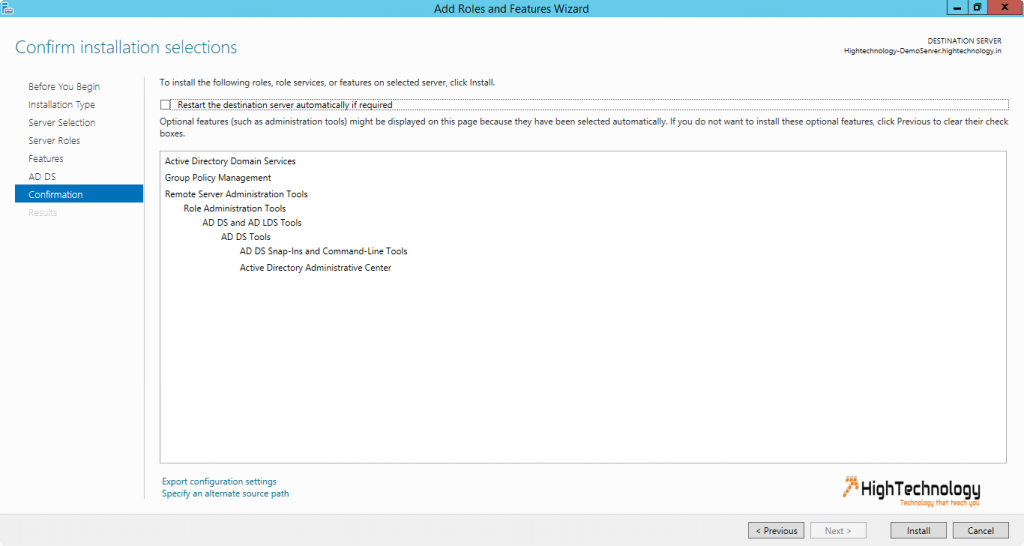
5. On Confirm installation selection window click on NEXT.
6. On Completion of installation click close.
Part 2 – (Promote server as domain controller):
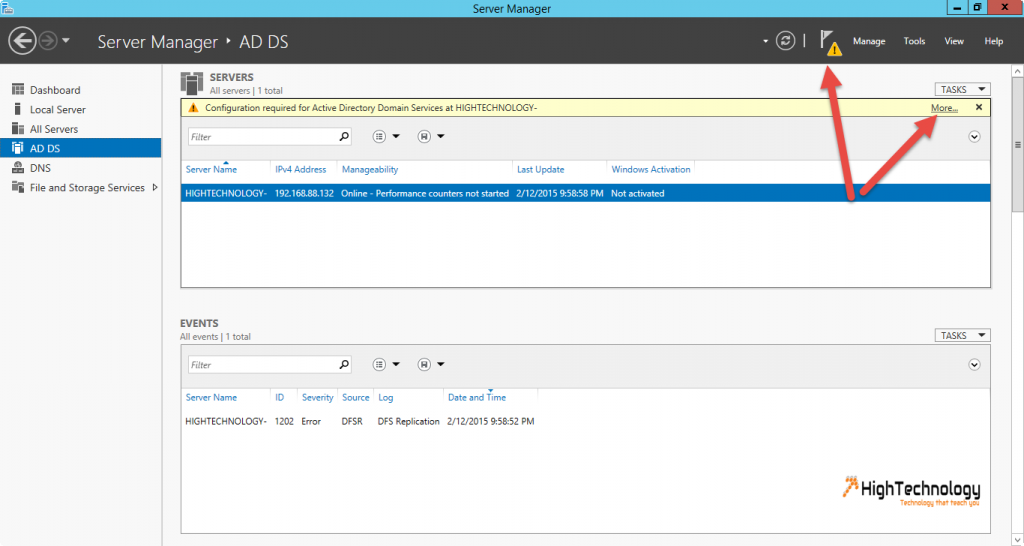
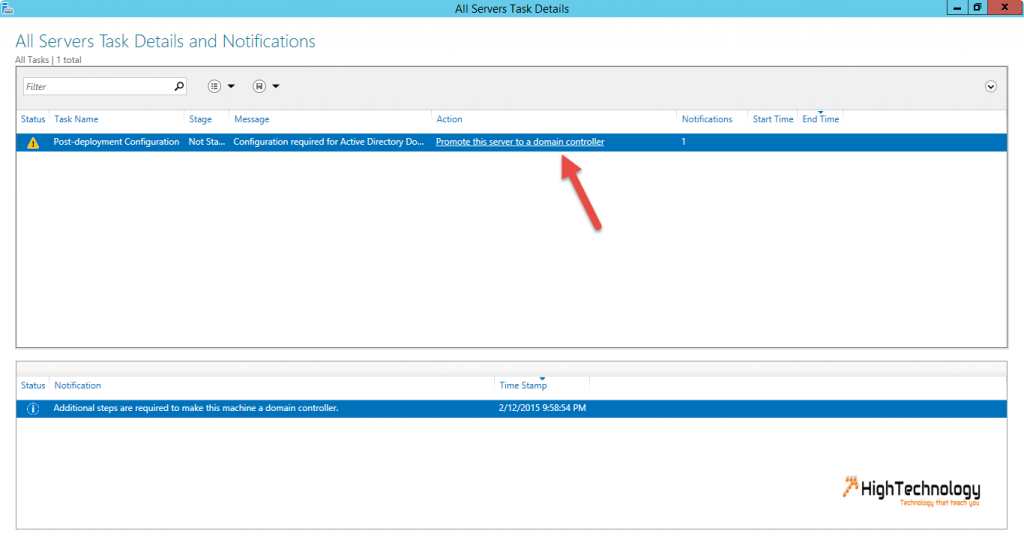
1. After installing Active directory services, select Promote server to a domain controller from the server notification page.
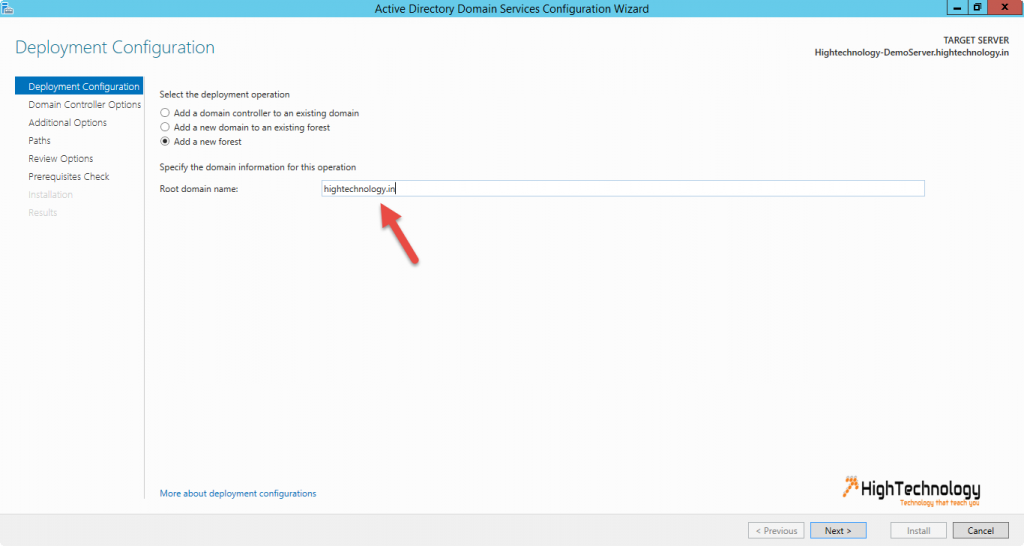
2. On Deployment Configuration window, check Add a new forest. And put your domain name. Click on NEXT.
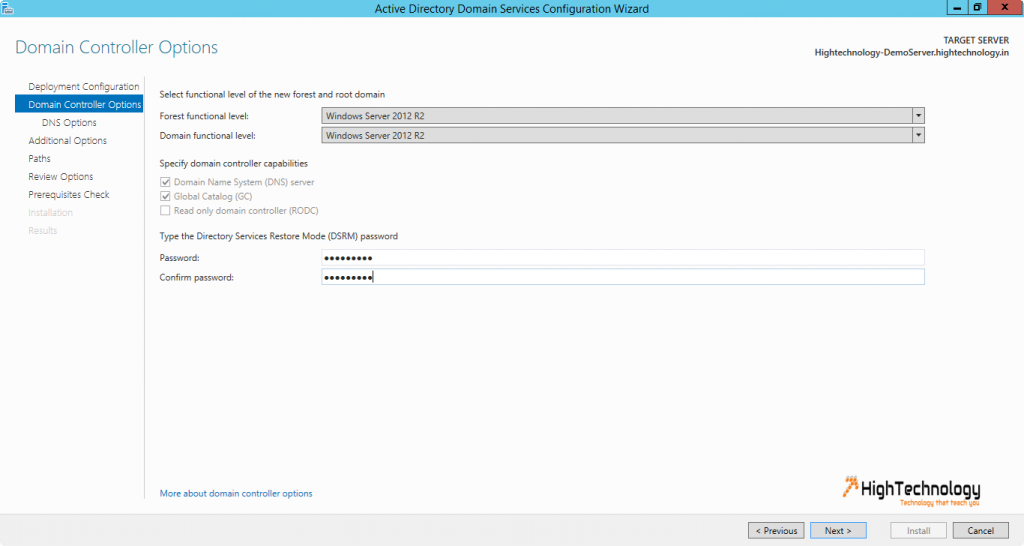
3. On Domain Controller Options window, Select forest and domain functional level. You’ll also set your DSRM password here. Click NEXT > NEXT.
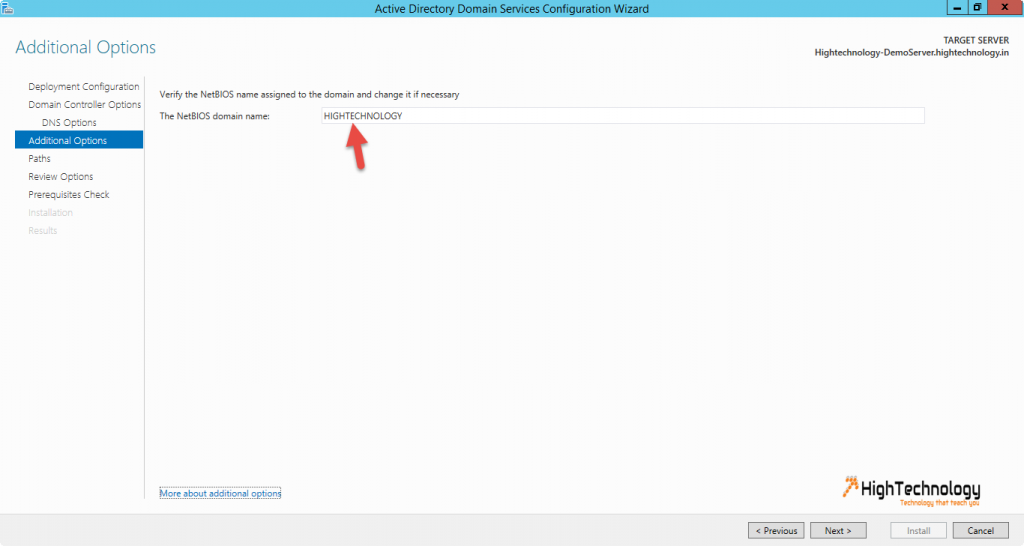
4. Enter NetBIOS name in the NetBIOS and Directory Path window. Click NEXT.
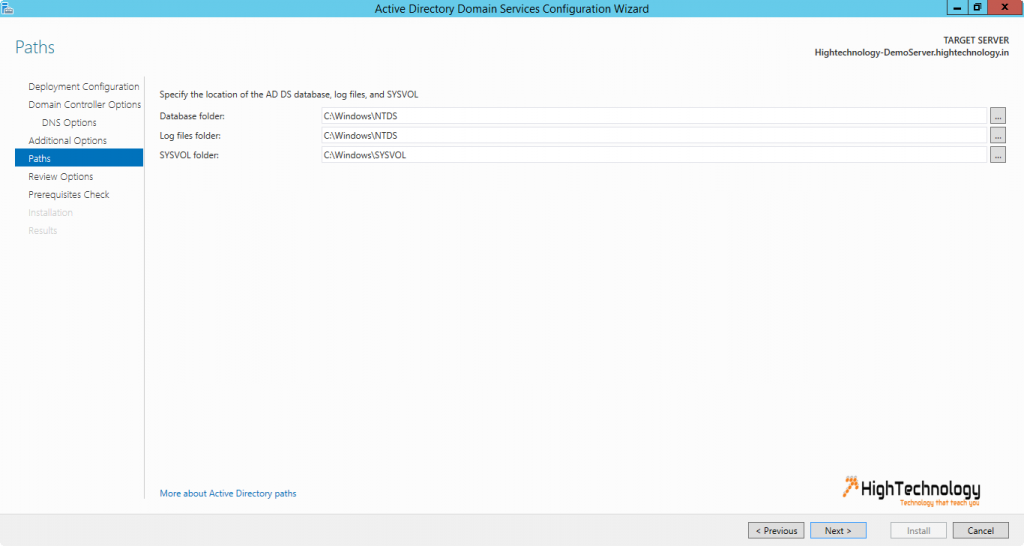
5. Select the folder path for Active directory database files, log files, SYSVOL, By default it will be stored in “C:\Windows\….” folders. Click on NEXT.
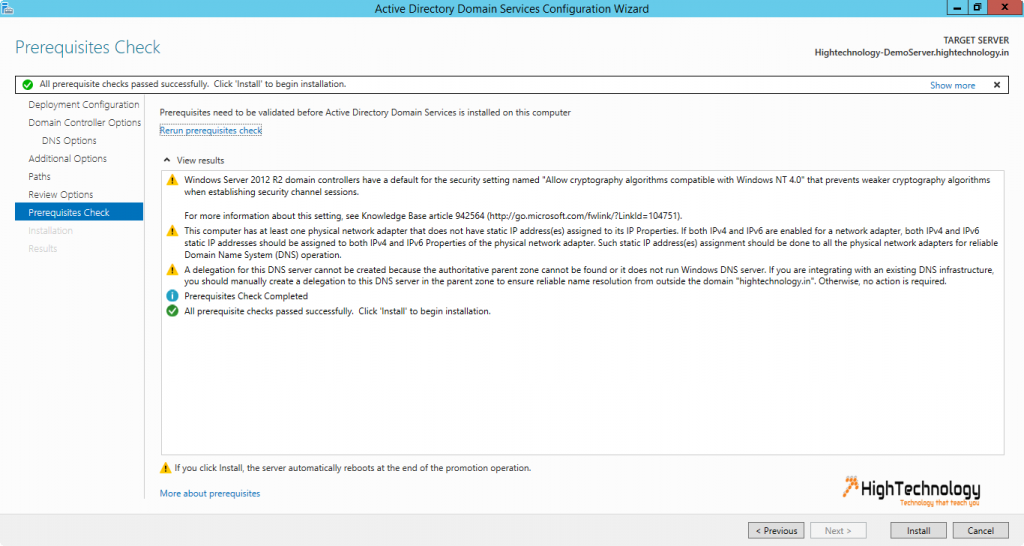
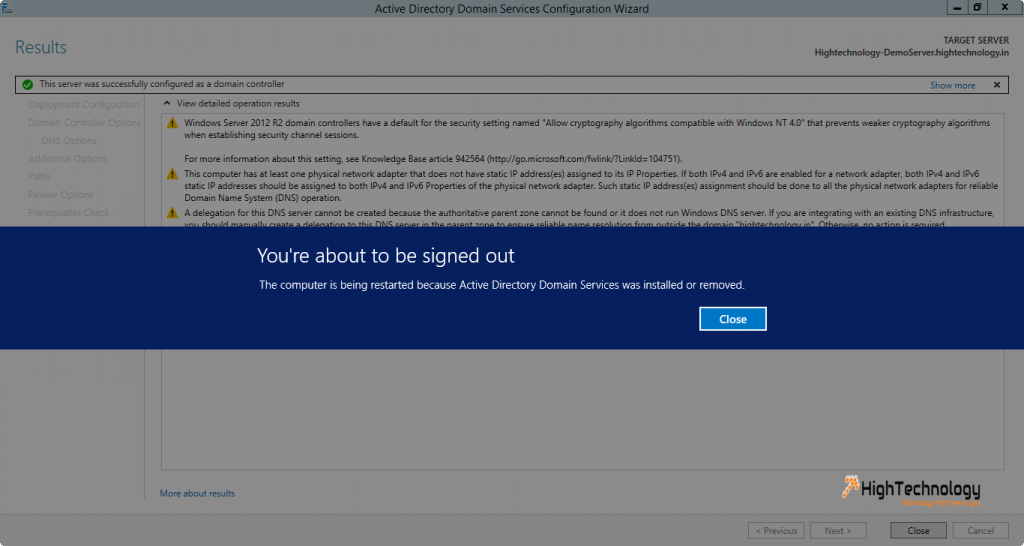
6. Click NEXT, On Next screen all prerequisites will be checked, if all fine. Click on Install.
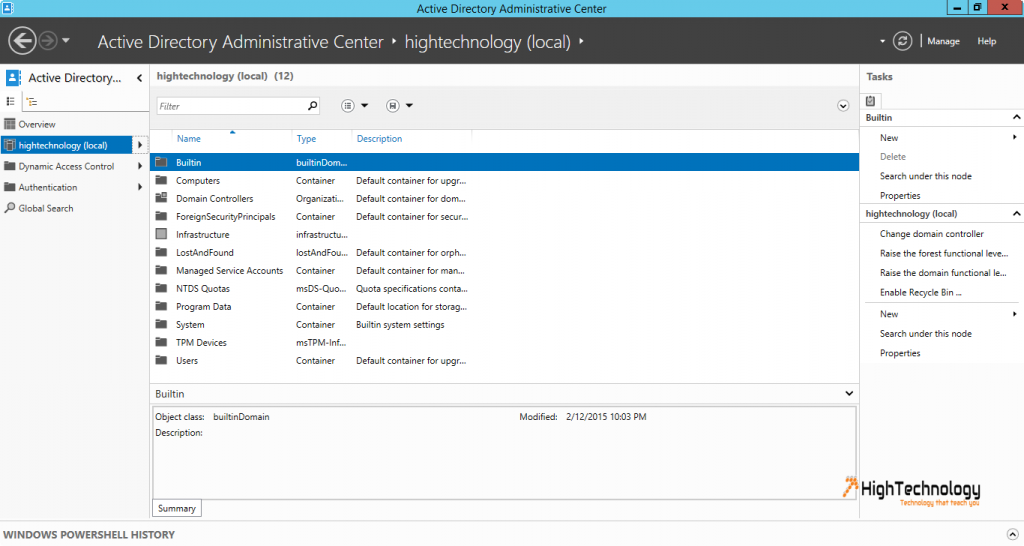
7. Server will be reboot after successful installation, and will be joined in domain itself.

