Step by Step SQL Server 2008 R2 Clustering-Part 3
Hi Friends, this is part 3 of our clustering series Step by Step SQL Server 2008 R2 Clustering and Step by Step SQL Server 2008 R2 Clustering-Part 2. On Part 1 we had competed Creating two Virtual Disk, Added two user for SQL Server & SQL Server Agent Services to run. Here we will start creating nodes(Node1 and Node2). On Part 2 We configured iSCSI Initiator, Converted Virtual Disk to Simple Disks, Installed Failover Clustering and created a cluster.
Step by Step SQL Server 2008 R2 Clustering Part 1
Step by Step SQL Server 2008 R2 Clustering Part 2
Step by Step SQL Server 2008 R2 Clustering Part 3
In this post we will install SQL Server on both nodes(Node1 and Node2) and configure rest of things.
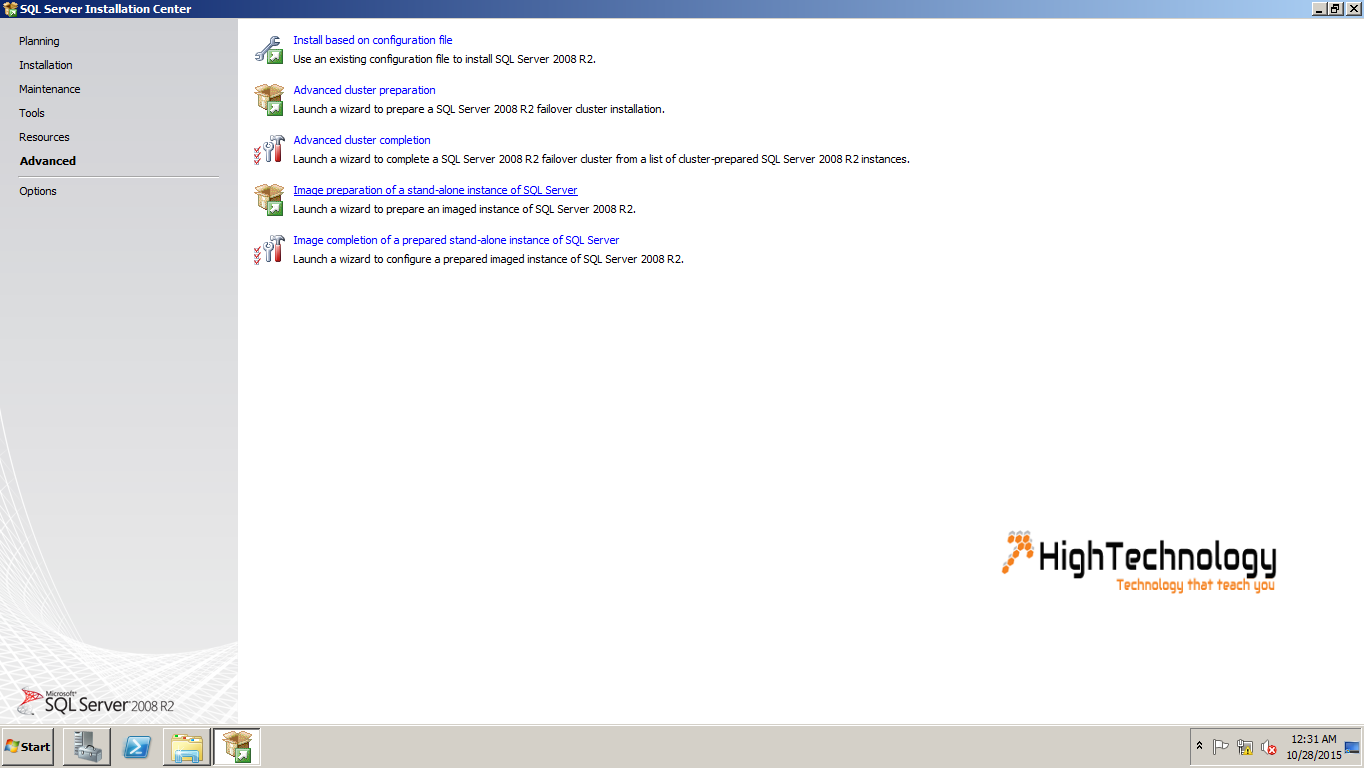
1. Now add SQL Server installation media to Node1. Double Click on Setup.exe.This will open SQL Server Installation Center > Go to Advanced Tab > Click on Advanced Cluster preparation.
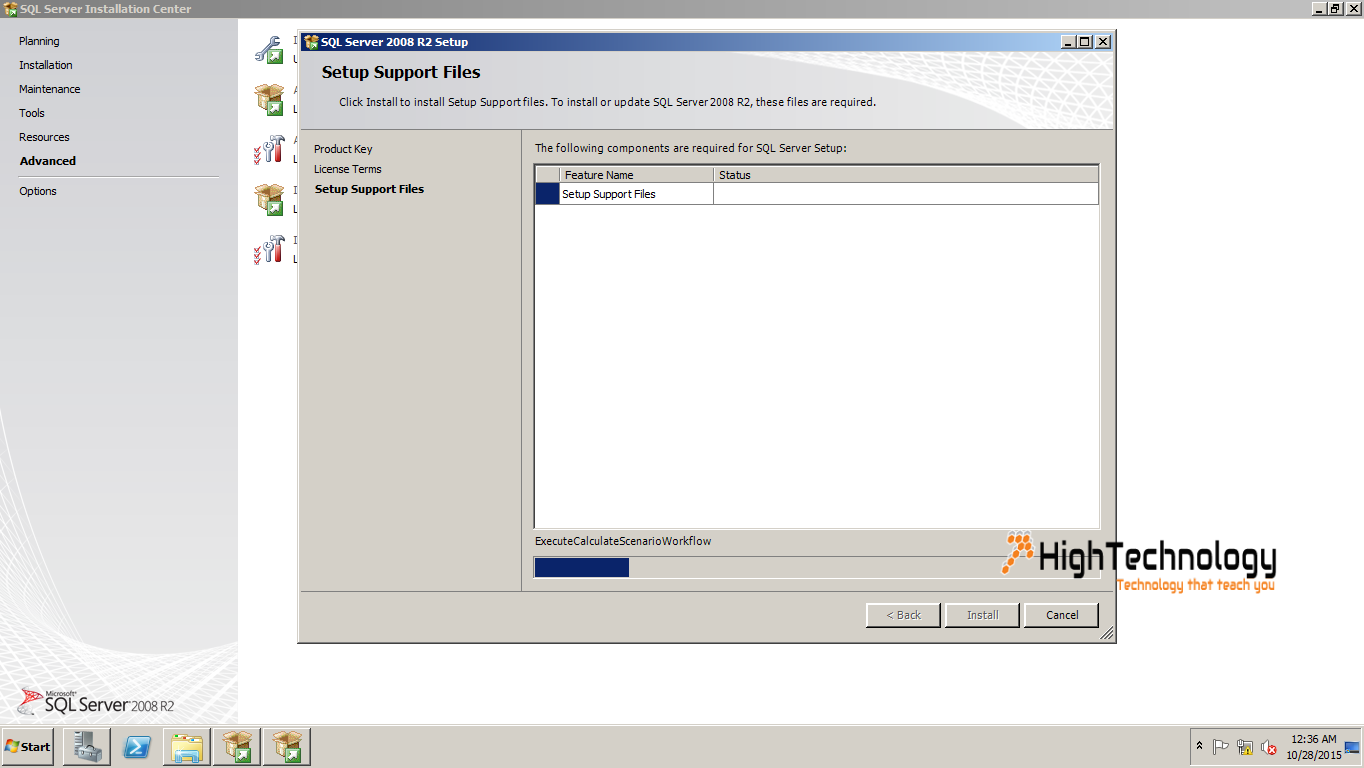
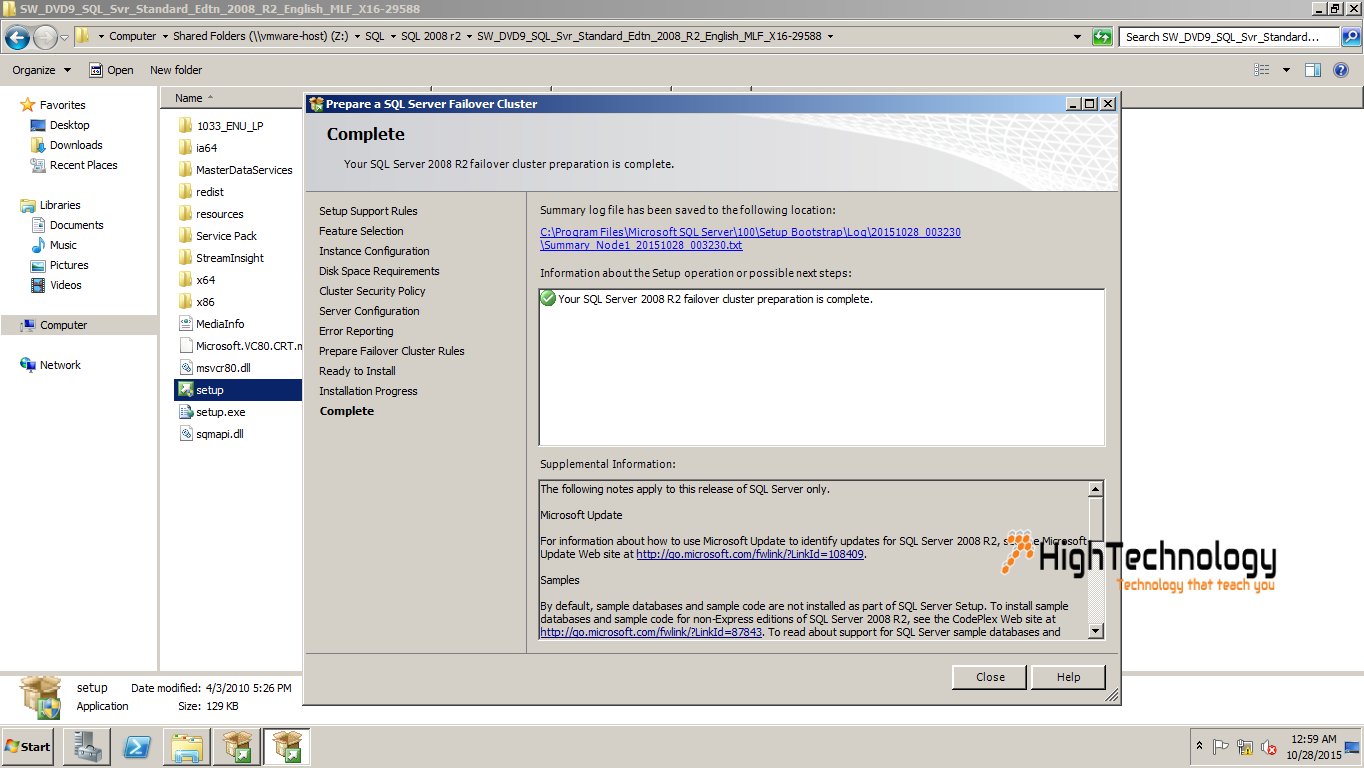
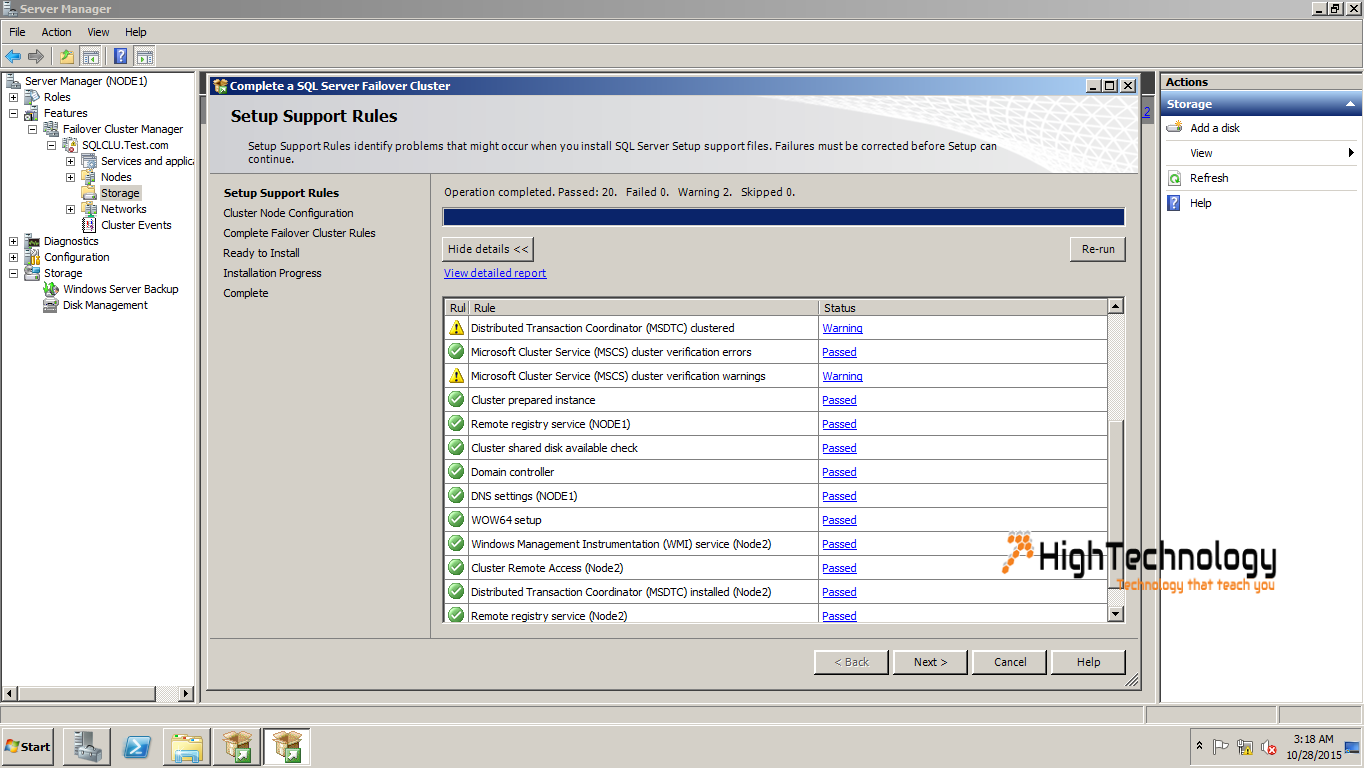
2. Enter the product key, click next > Accept License terms > Click next.Click on Install, this will install setup support files.
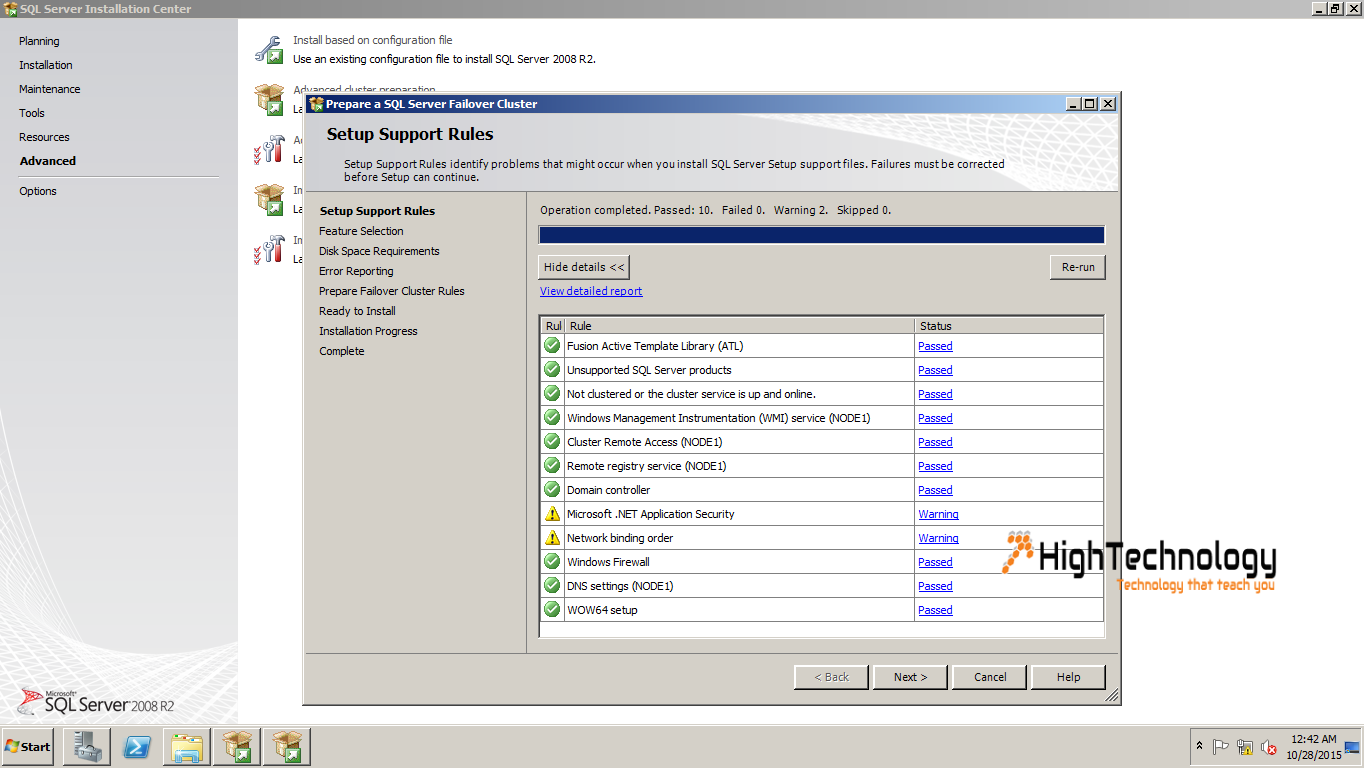
3. Upon successful Installation of setup files, click on Next.
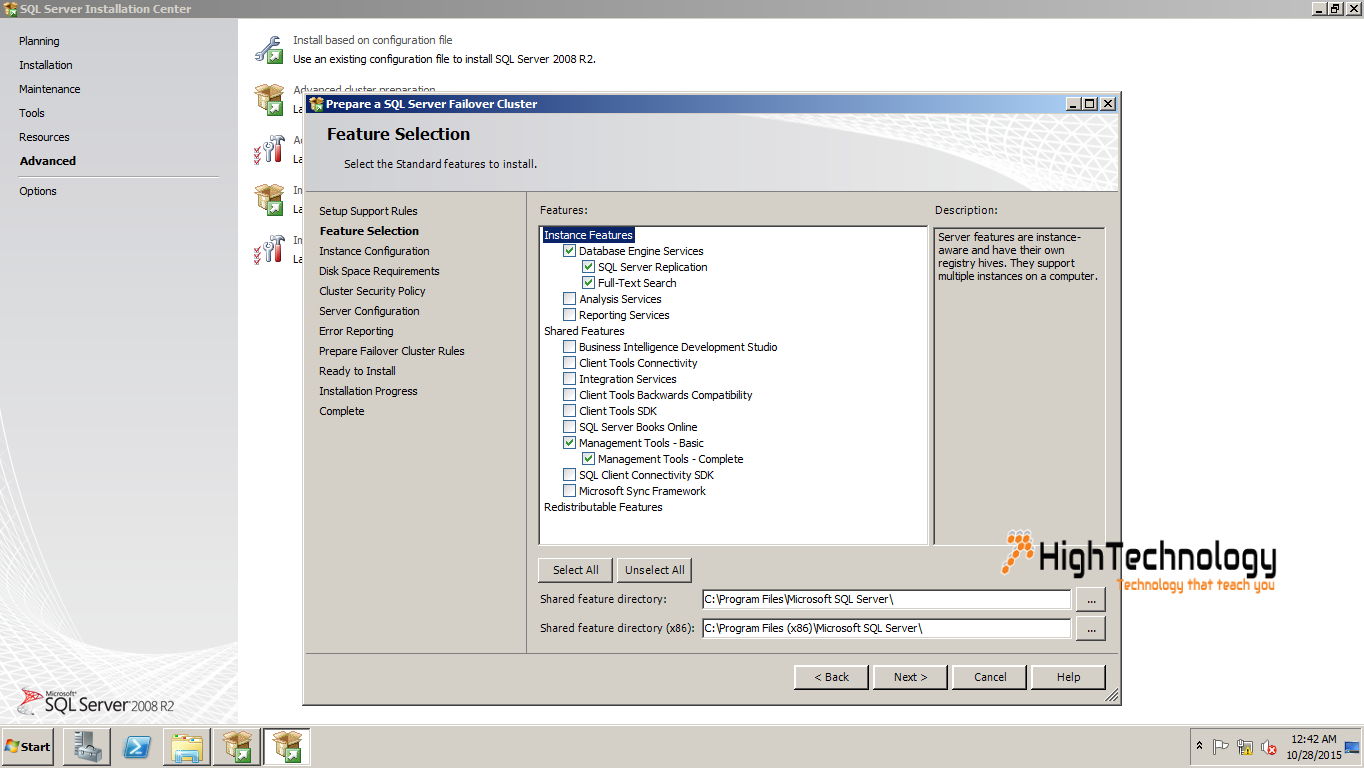
4. Select Instance Features as mentioned in below image(you can choose according to you too).
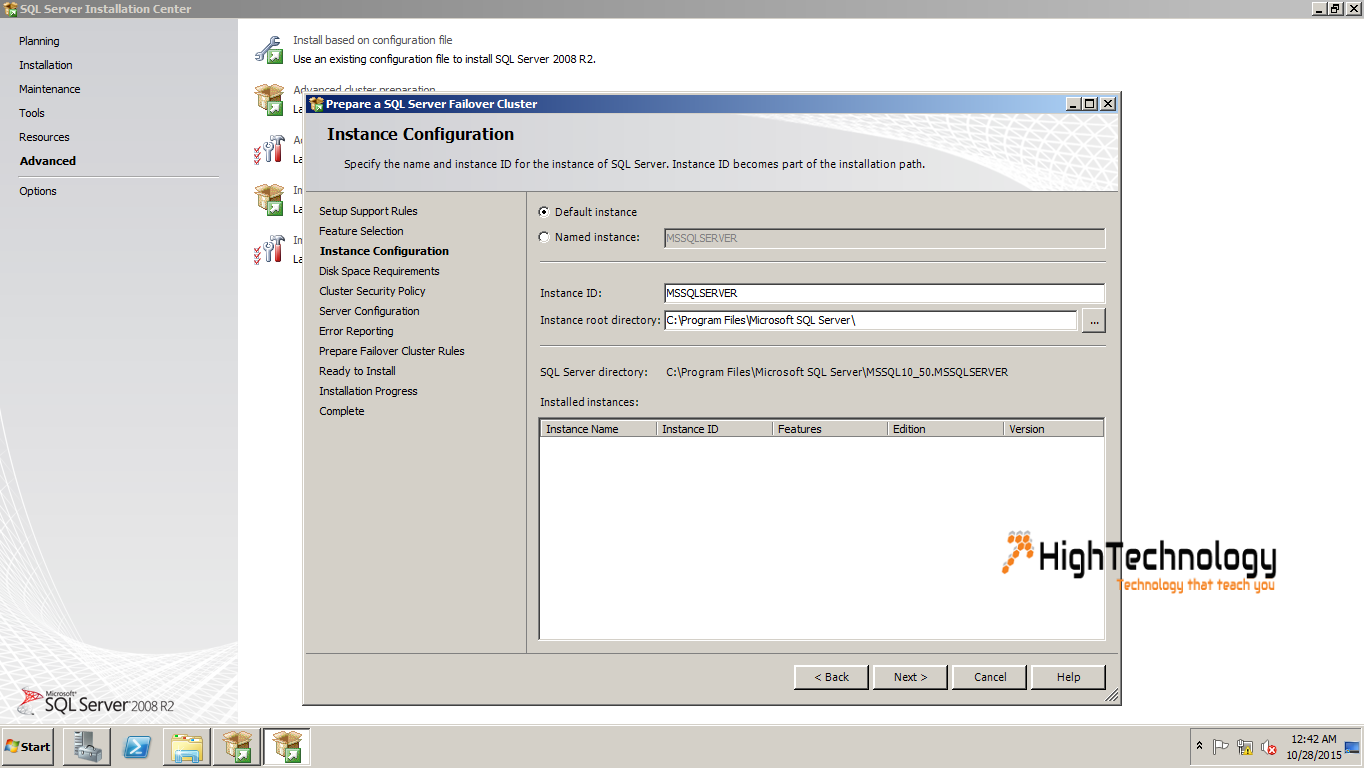
5. Choose Default Instance, click next.
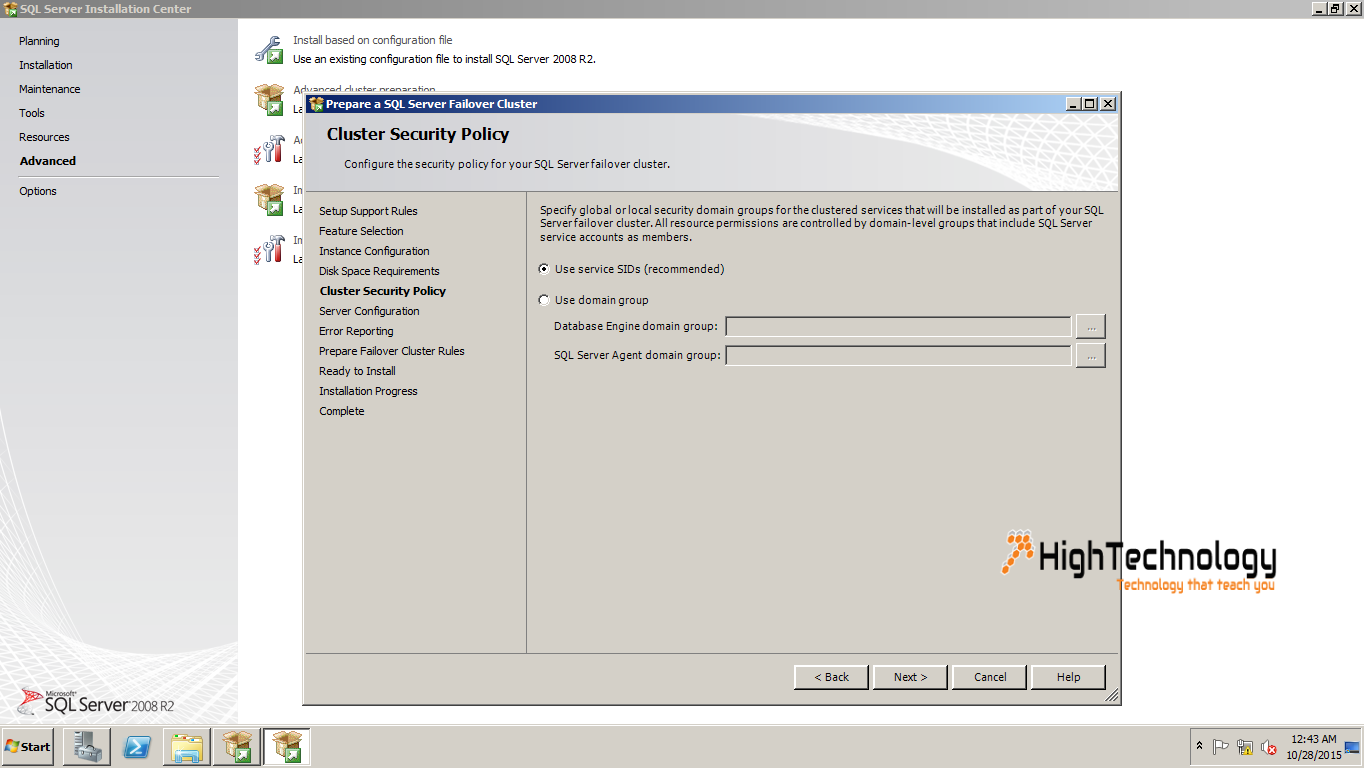
6. Choose use service SID’s. and click on next.
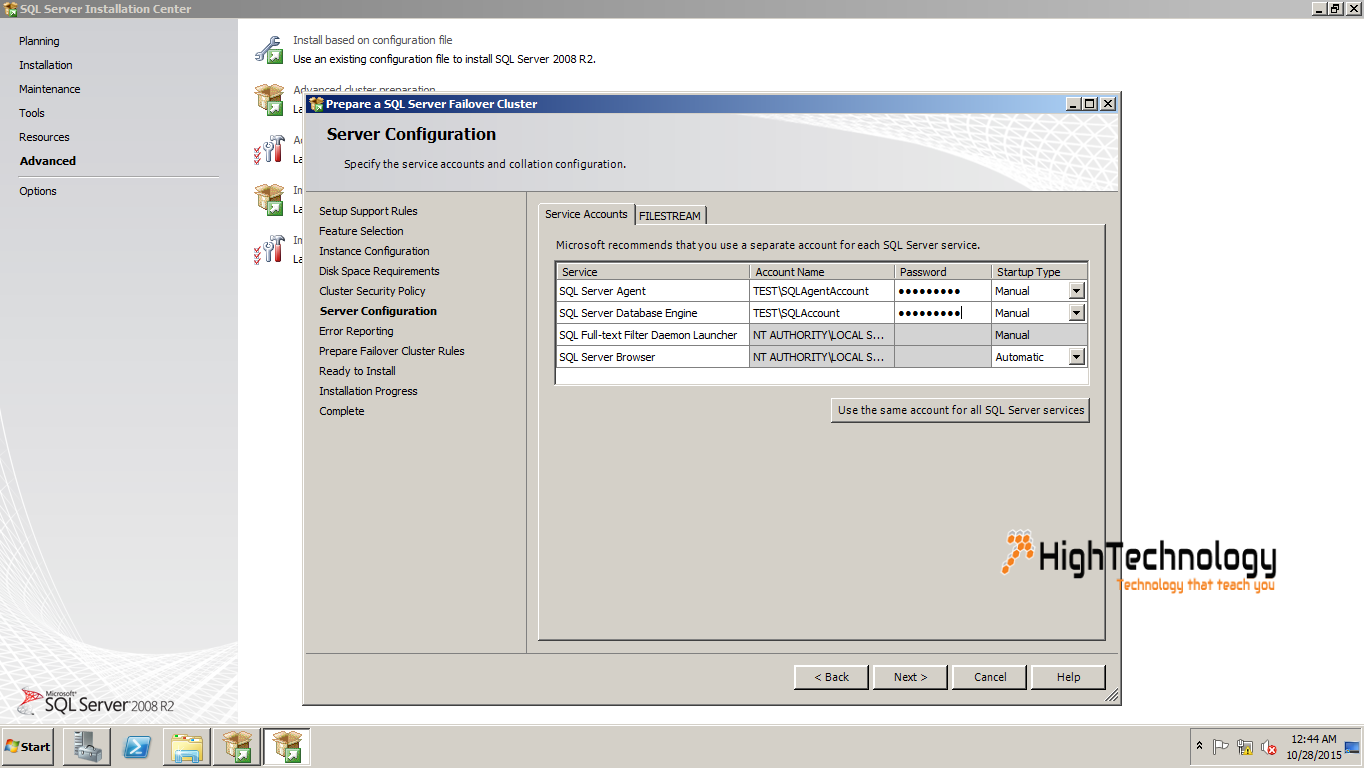
7. Enter account details For the “SQL Server Agent” service enter the account name “Test\SQLAgentAccount” which we created it after setup domain controller. For the “SQL Server Database Engine” service enter the account name “Test\SQLAccount”. Enter their passwords and click on Next.
8. Click on next.
9. Upon installation finish, repeat step 1 to step 8 on Node2.
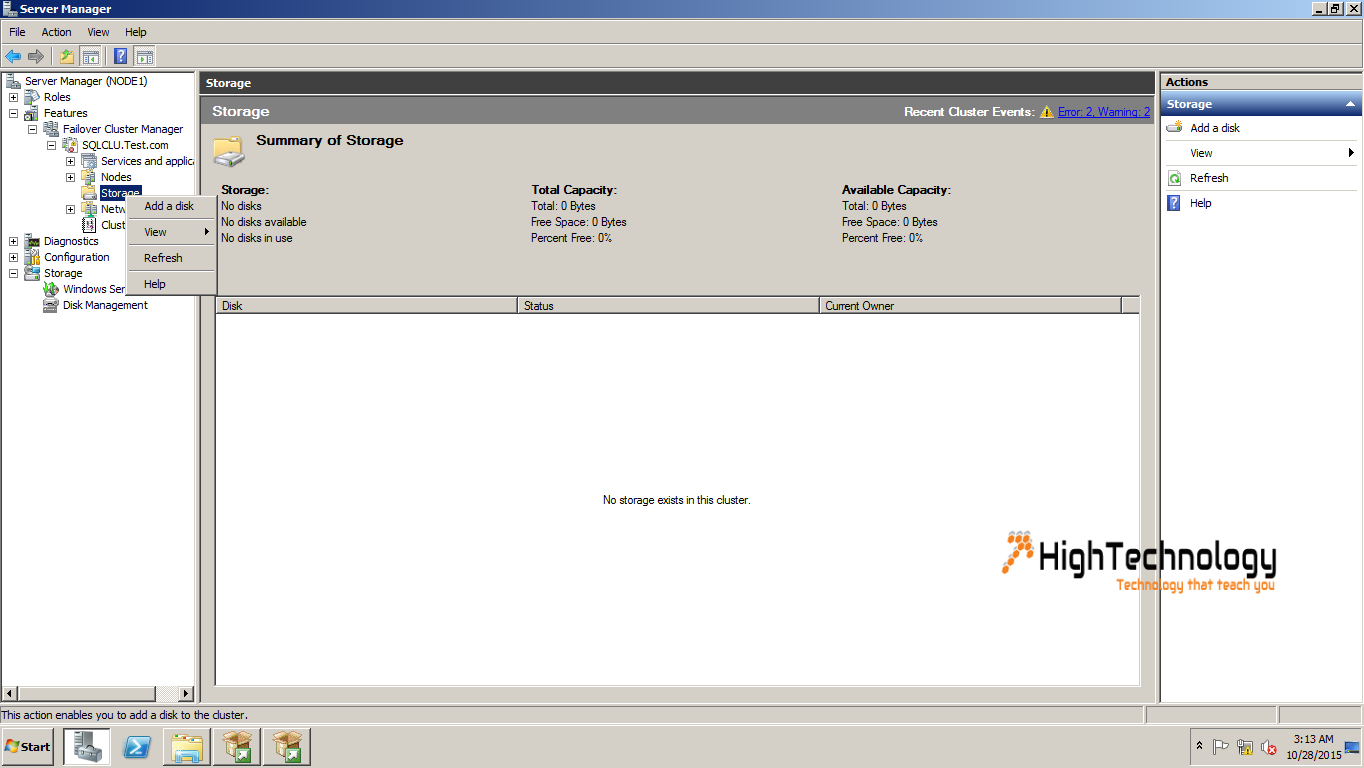
10. On Completion of installation on Node2, Go back to Node1 and Open Server Manager. Now Expand Features > Failover Cluster Manager > Right Click on Storage and click on Add Disk.
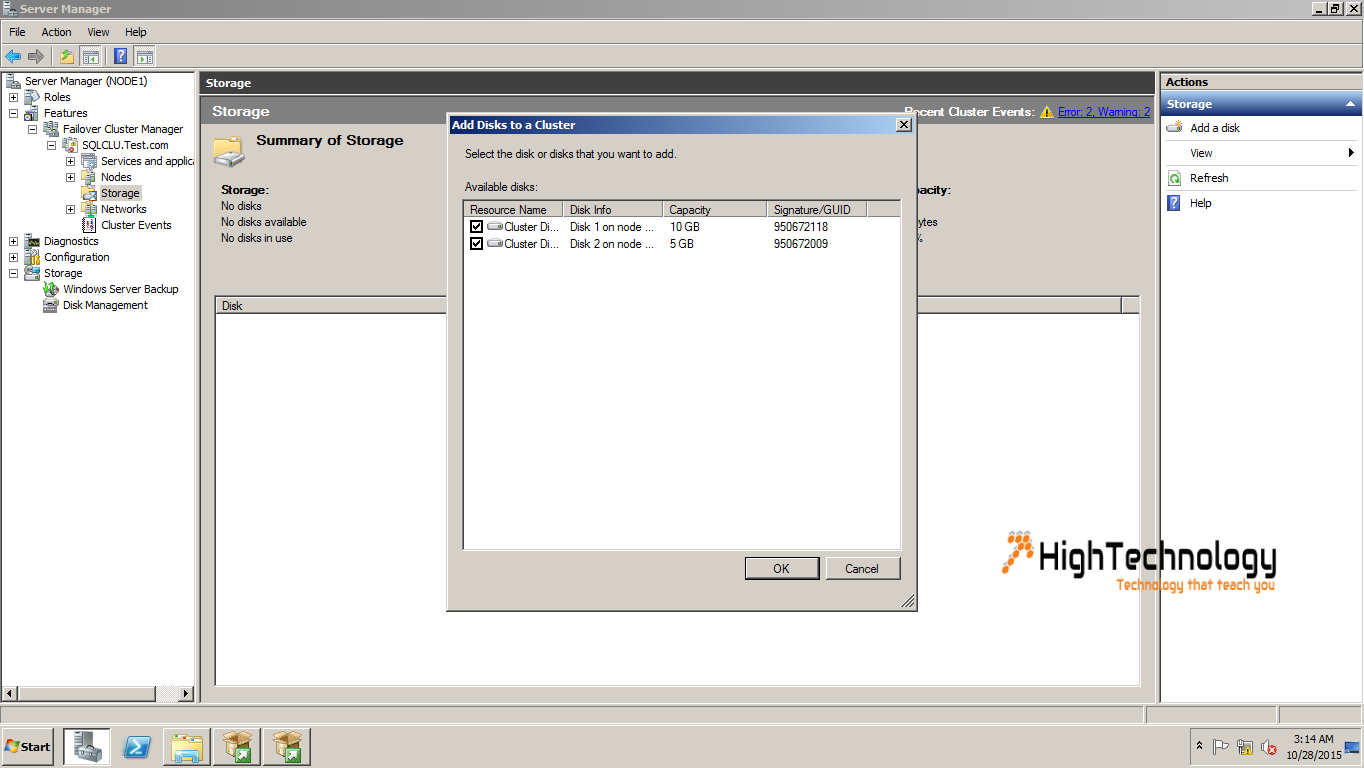
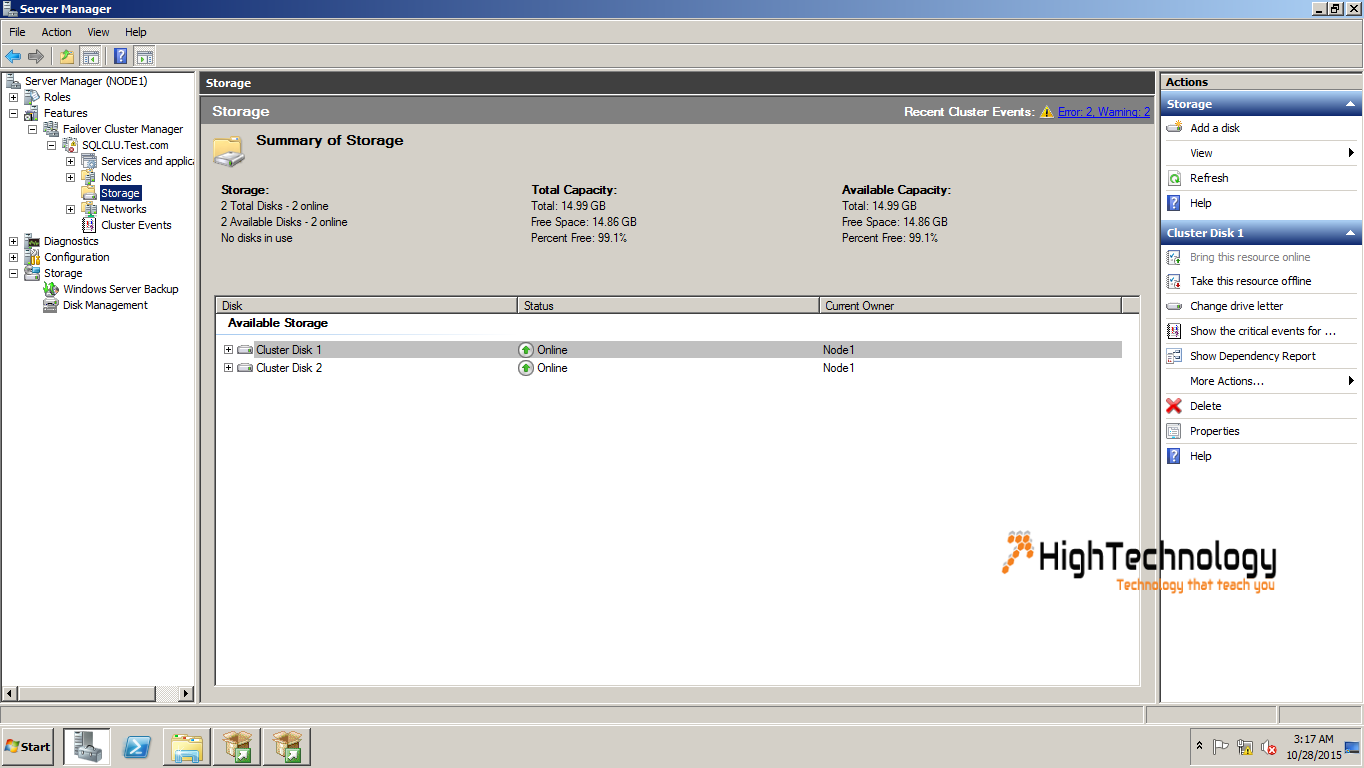
11. Both of our Virtual Disk will be displayed here, Click ok and Our Disk is added.
12. Go to Node1 and click on Setup.exe. It will open SQL Server installation Center. now click on Advanced Cluster Completion. Click next.Click on Install, this will install setup support files. Click on Next.
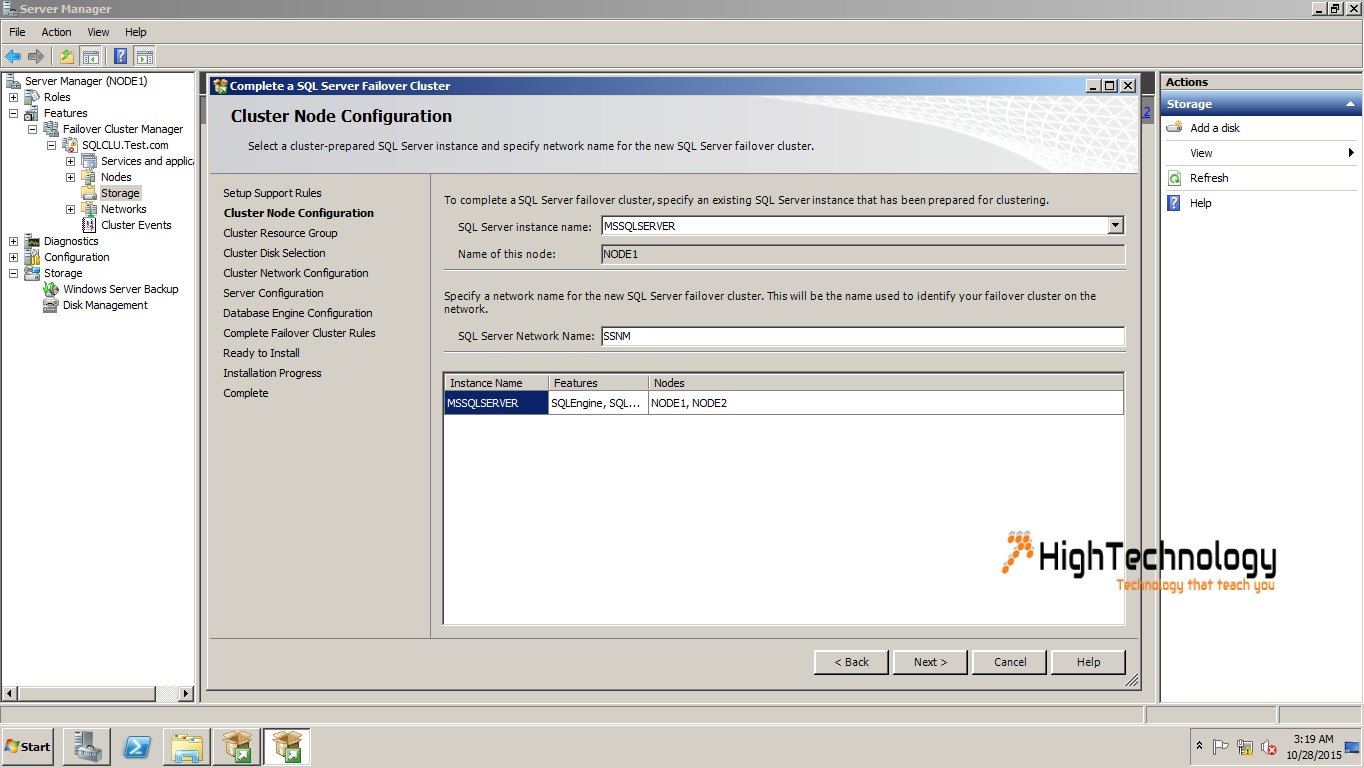
13. In this we will start with Cluster Node Configuration. Here we have to provide a name to SQL Server Network Name. Click on Next.
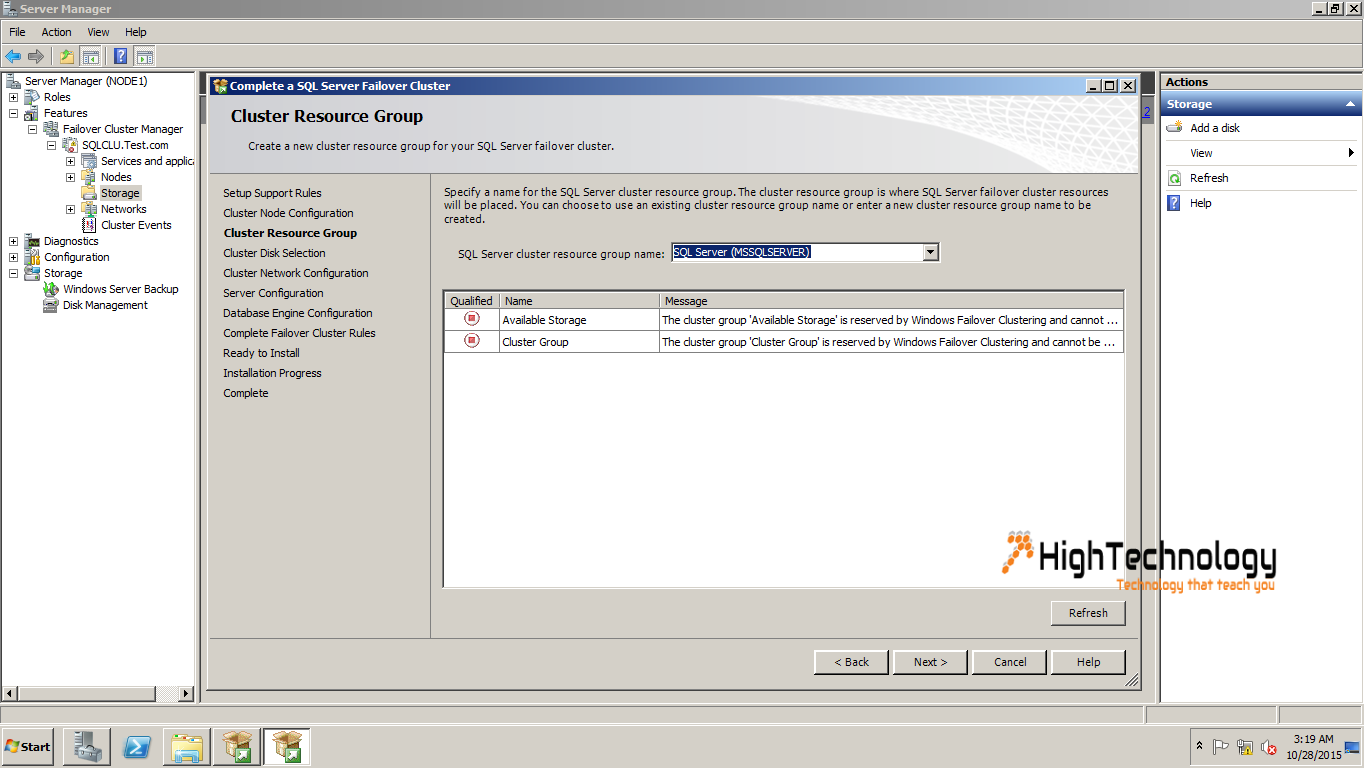
14. Click Next.
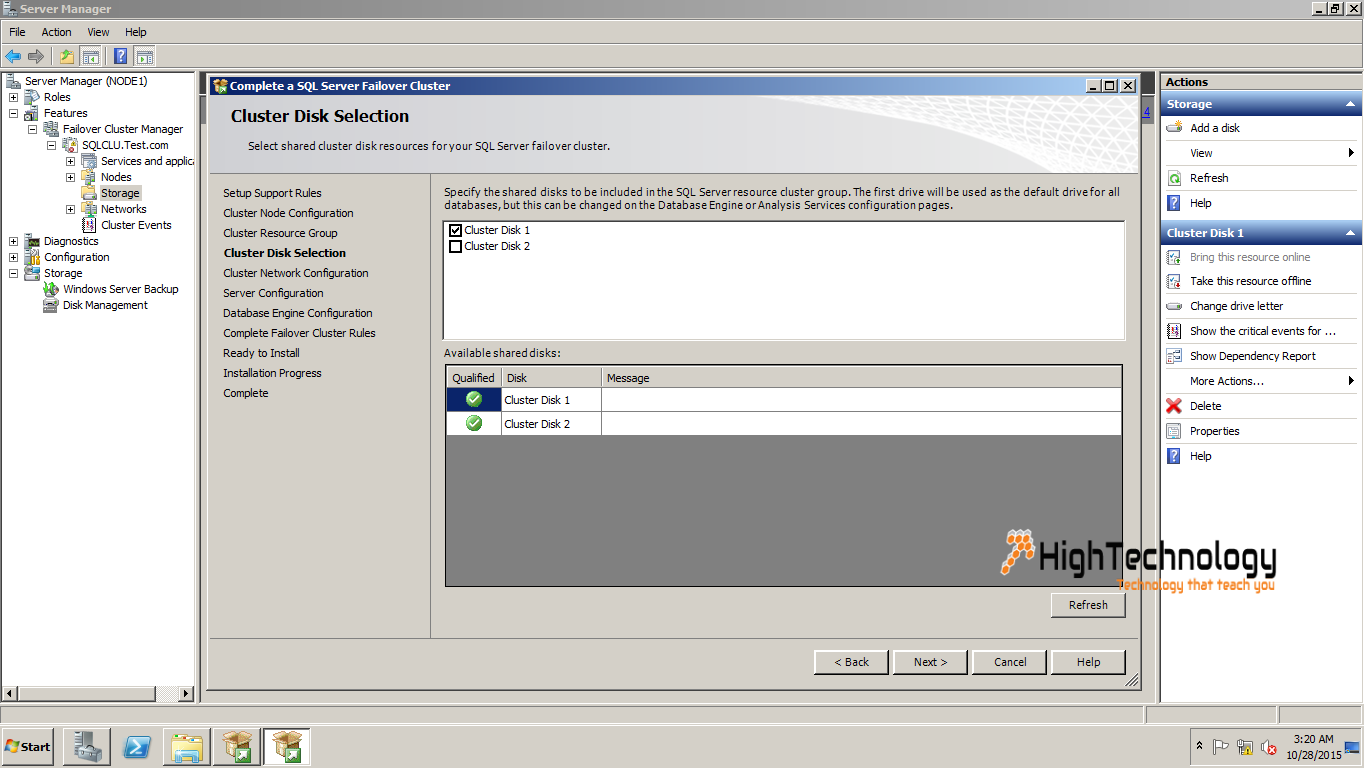
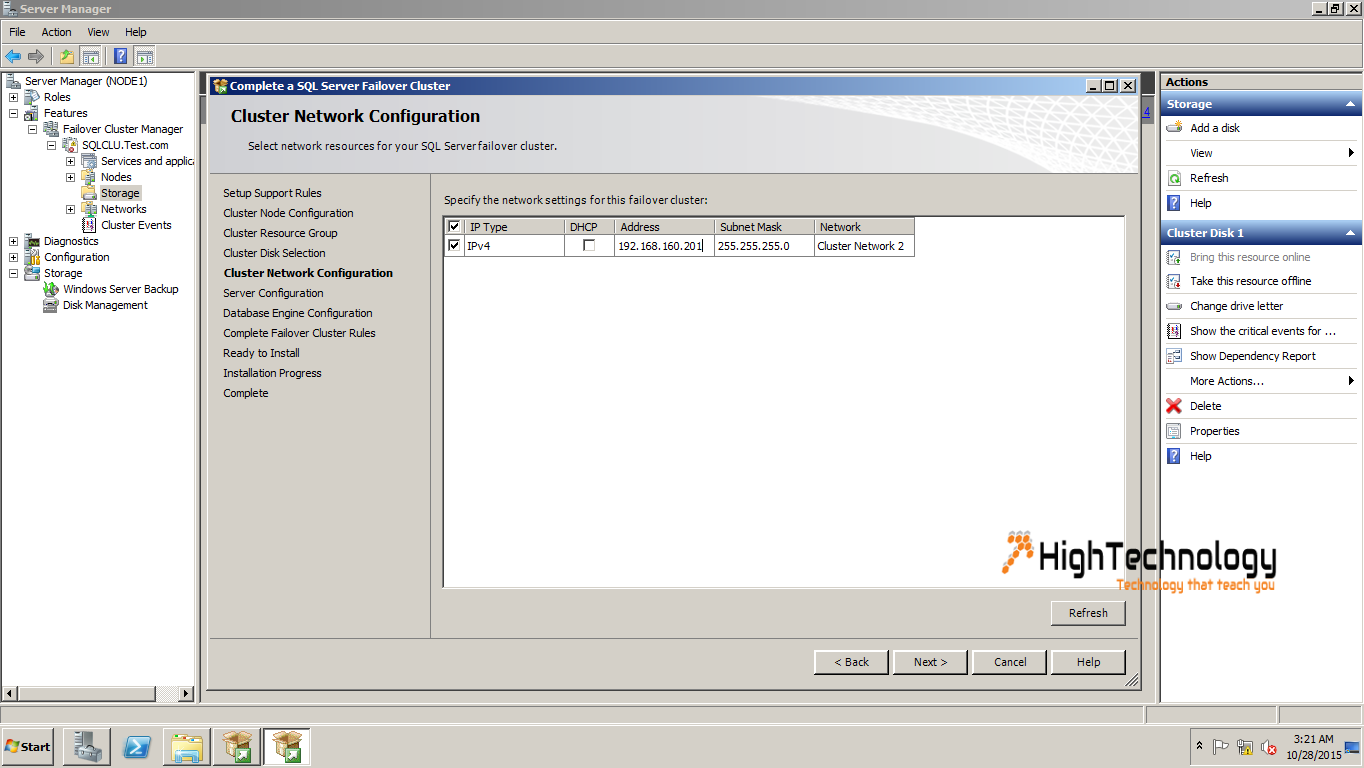
15. Select Cluster Disk for Hosting Data and click on next.
16. Enter IP address to SQL Cluster.
17. Click Next on Collation Window.
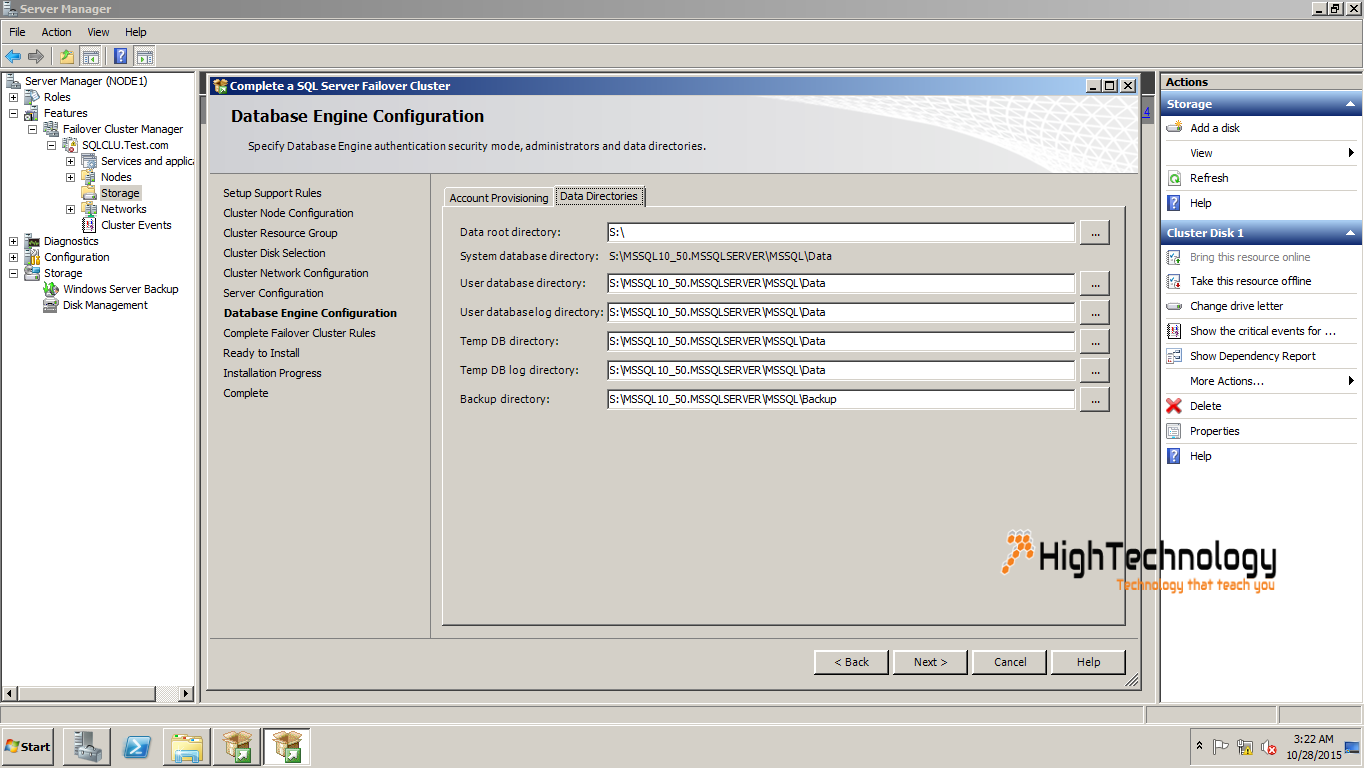
18. Select “Windows authentication mode”, click on “Add Current User” and Next. You Also can check here on Data Directories by default it shows our Cluster Disk1. Click on Next.
19. Click on Next.
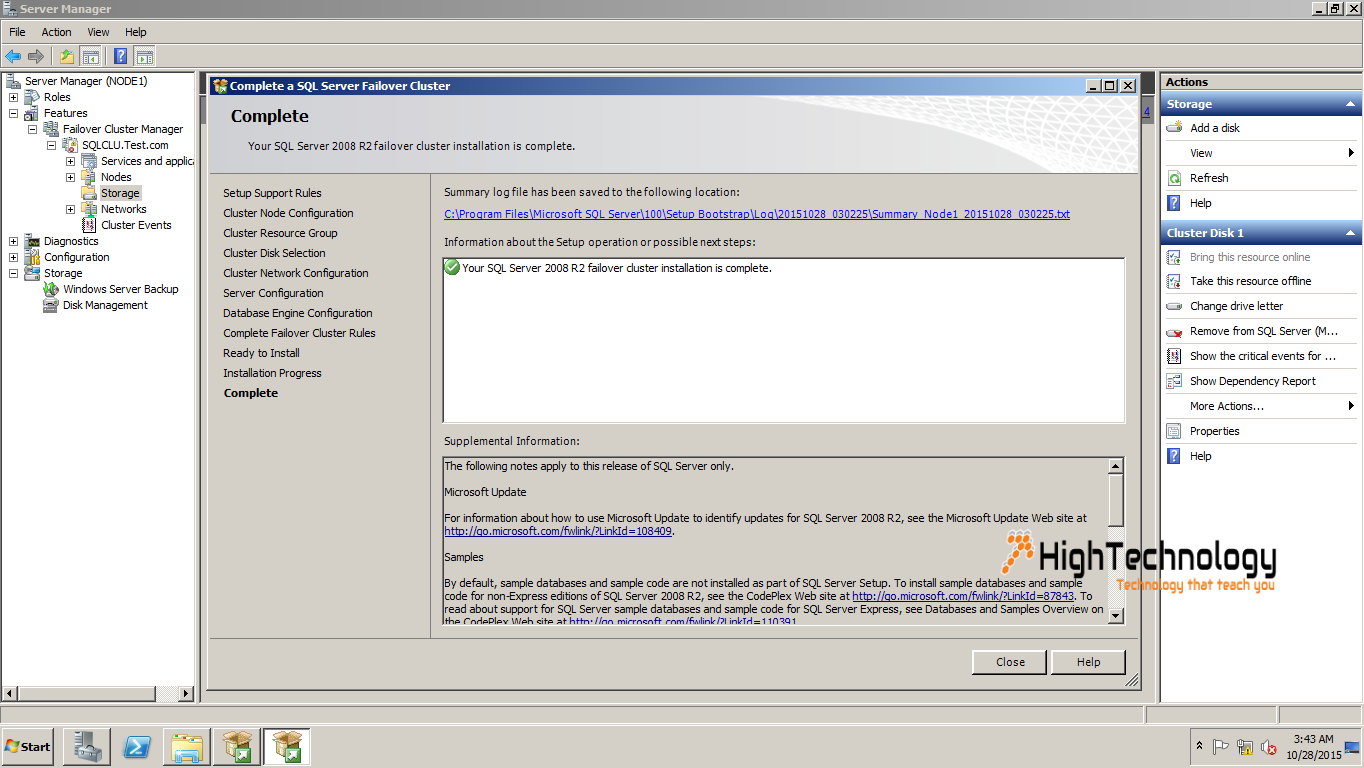
20. Now Click on Install. When Installation is finished.
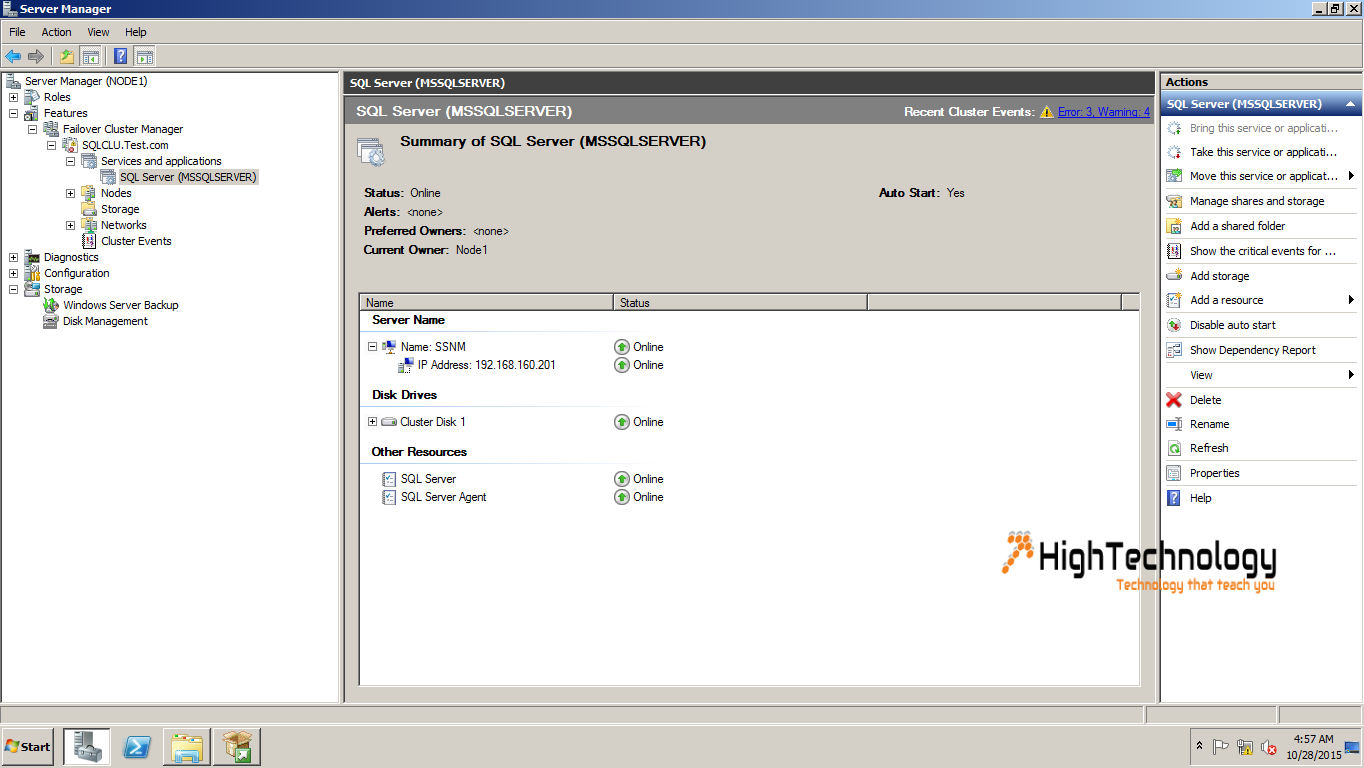
Open Failover Cluster Manager, and you can see in Failover Cluster Manager, in Services and Application it is showing MSSQLSERVER.
2 replies on “Step by Step SQL Server 2008 R2 Clustering-Part 3”
Great Job, explained nicely
Thanks Yashwant