
SAP S4HANA 1610 Distributed System Installation Part 2
Hi friends, In this post we will discuss about S4HANA 1610 Distributed System Installation, in our earlier post S4HANA 1610 Distributed System Installation we had covered installation of SAP HANA database.
SAP S4HANA 1610 Distributed System Installation Part 1
SAP S4HANA 1610 Distributed System Installation Part 2
SAP S4HANA 1610 Distributed System Installation Part 3
In this part we will cover up installation of ASCS (ABAP SAP Central Service) Instance.
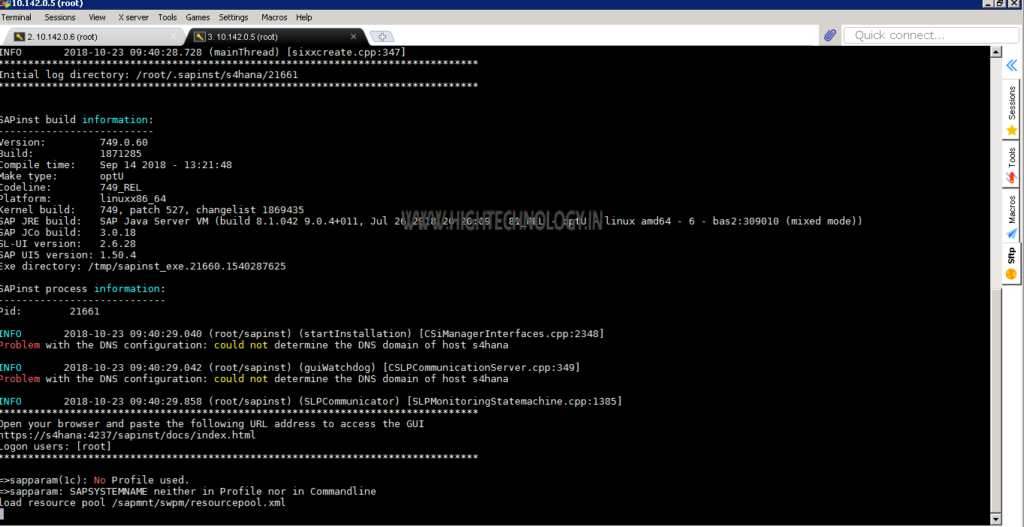
Step1: Go to SWPM directory and then execute the ./sapinst.
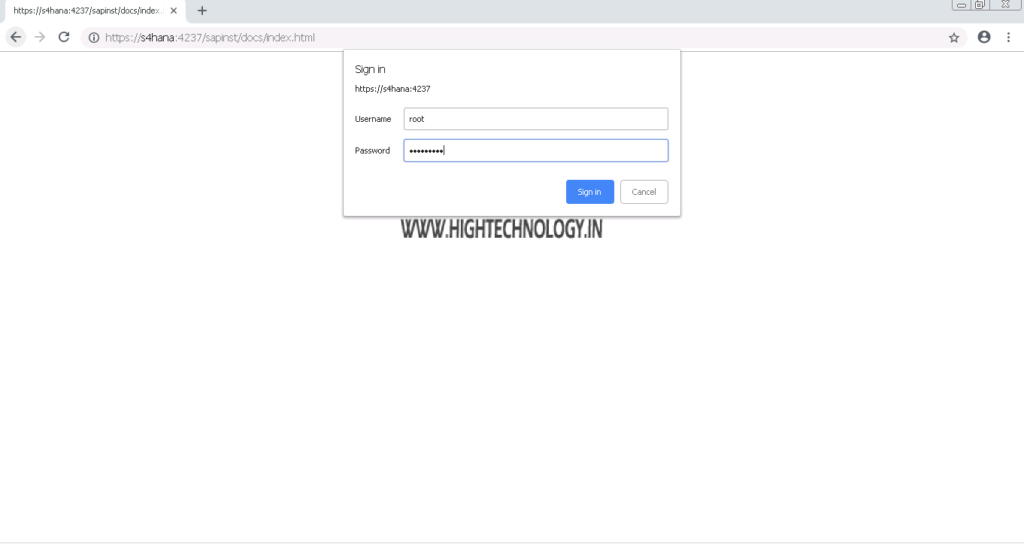
Step2: Open the provided link in browser and enter root credentials on browser pop-up window.
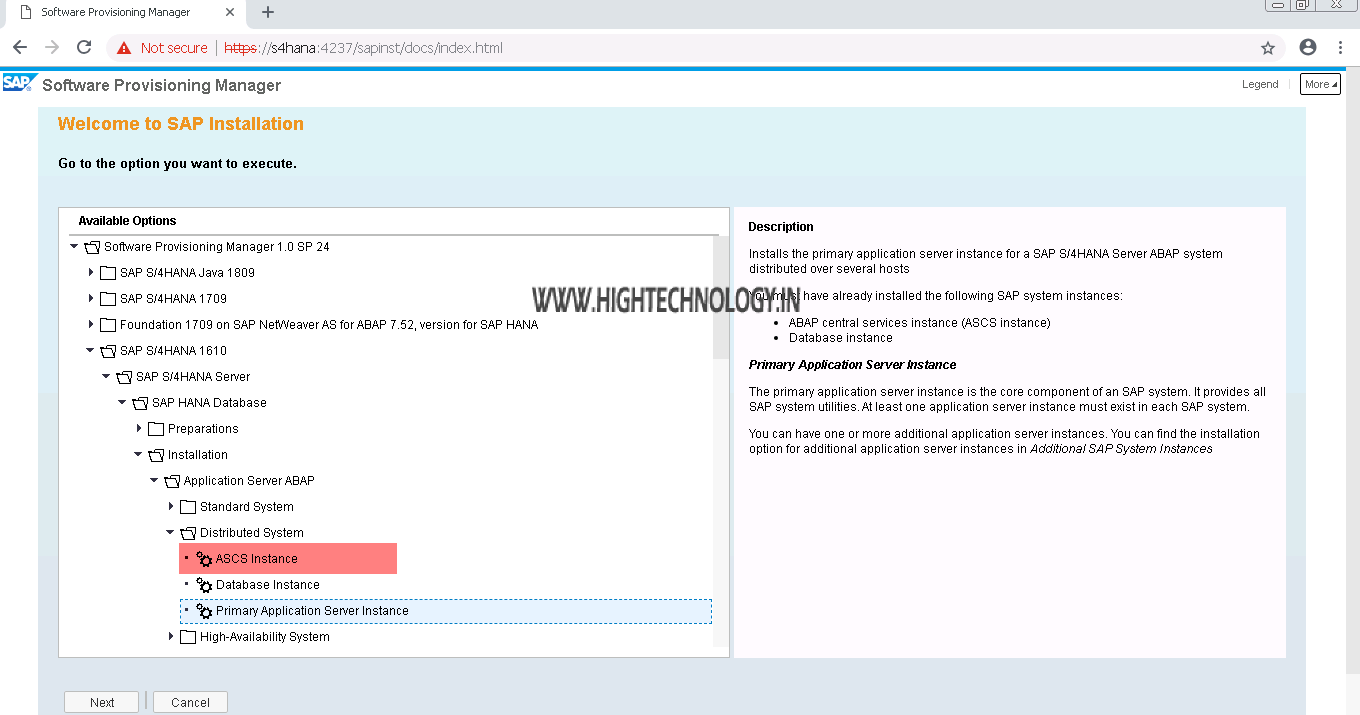
Step3: Now go to SAP S4HANA 1610 > SAP S4HANA Server > SAP HANA Database > Installation > Application Server ABAP > Distributed System > ASCS Instance.
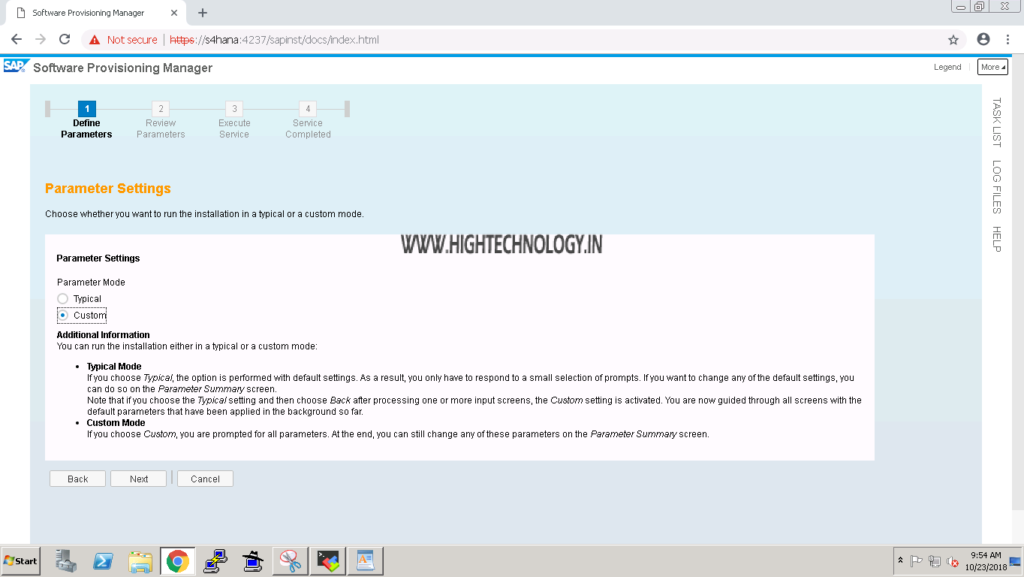
Step4: On Parameter Settings page, choose Custom. And click on Next.
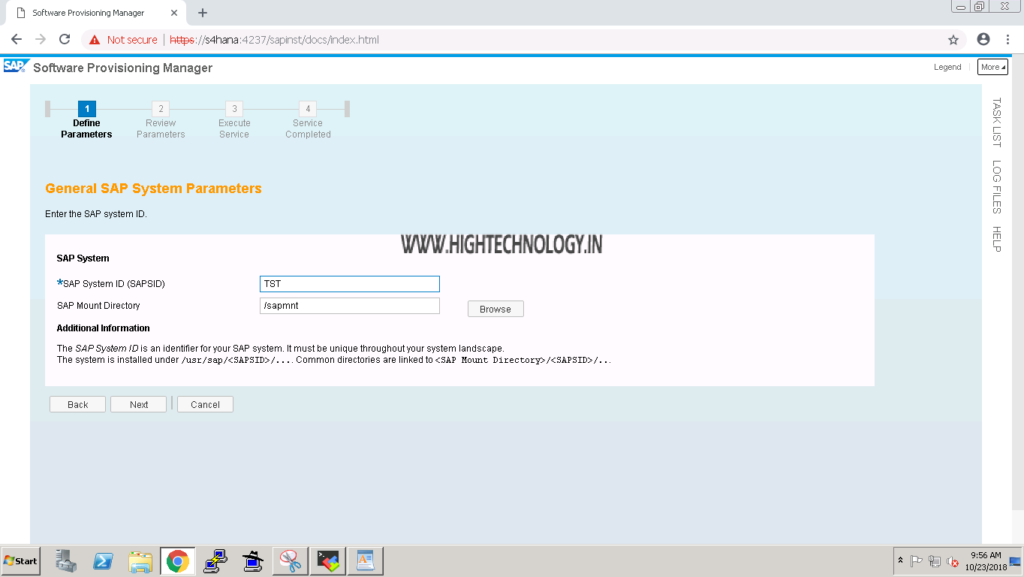
Step5: On Next Page enter SAP SYSTEM ID, and provide path for sap mount directory, and click on Next.
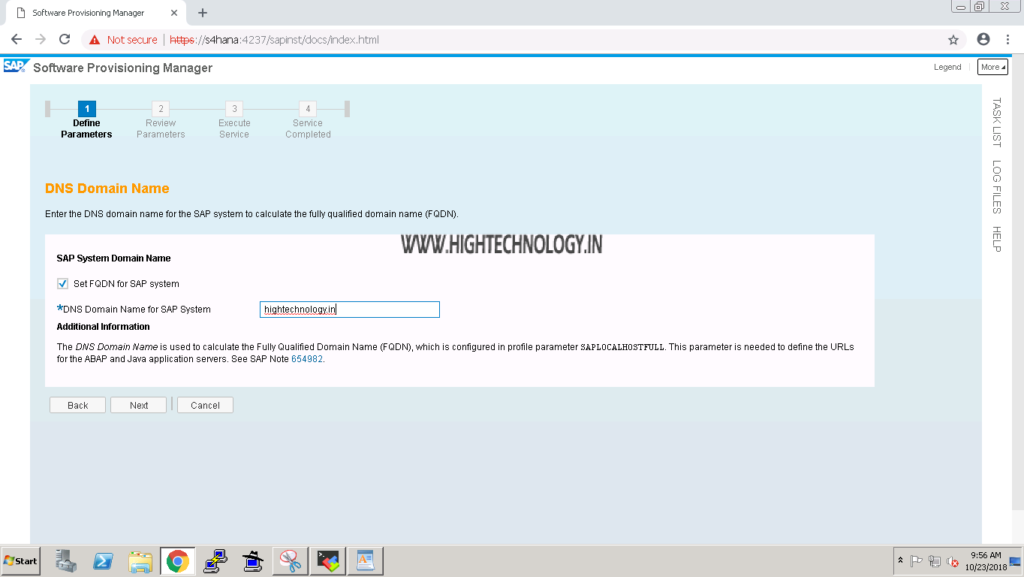
Step6: On next page enter DNS domain name for sap system, and click on Next.
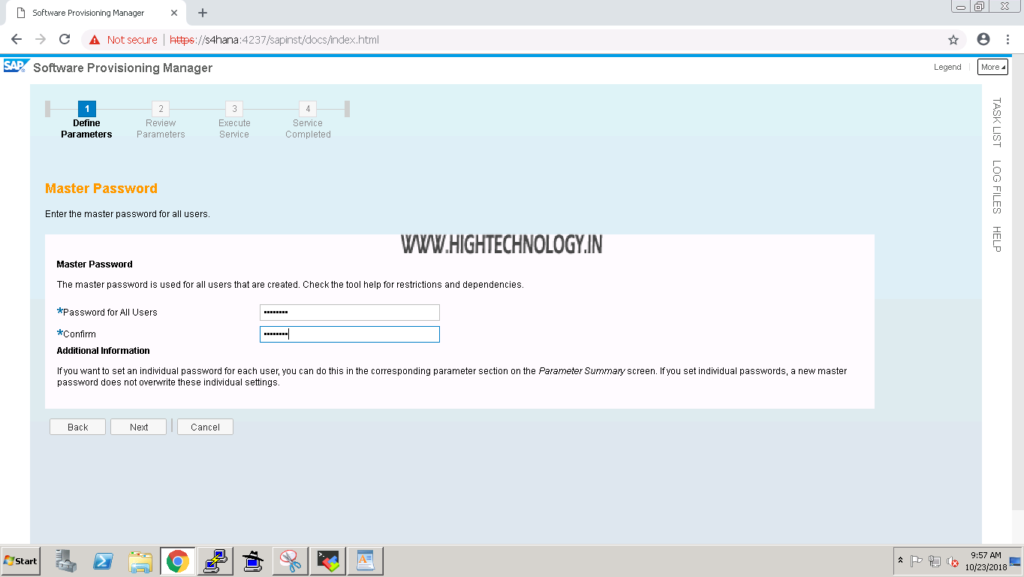
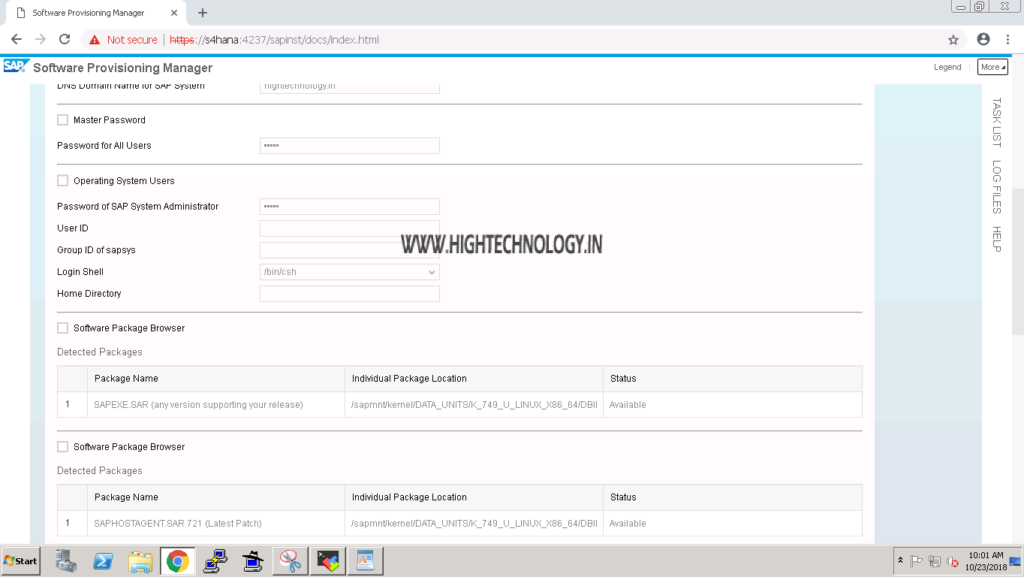
Step7: On next page enter Master password and click on Next.
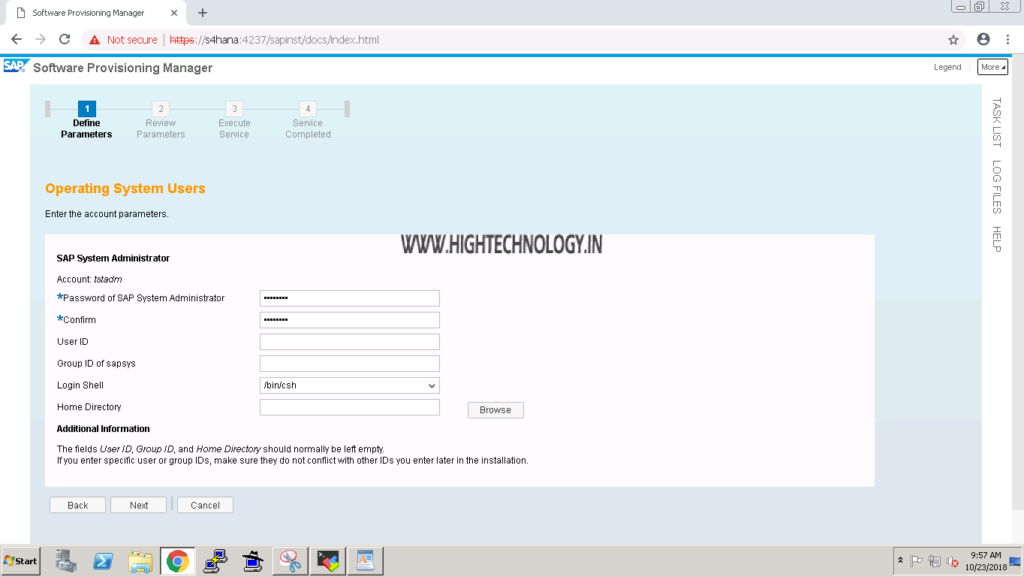
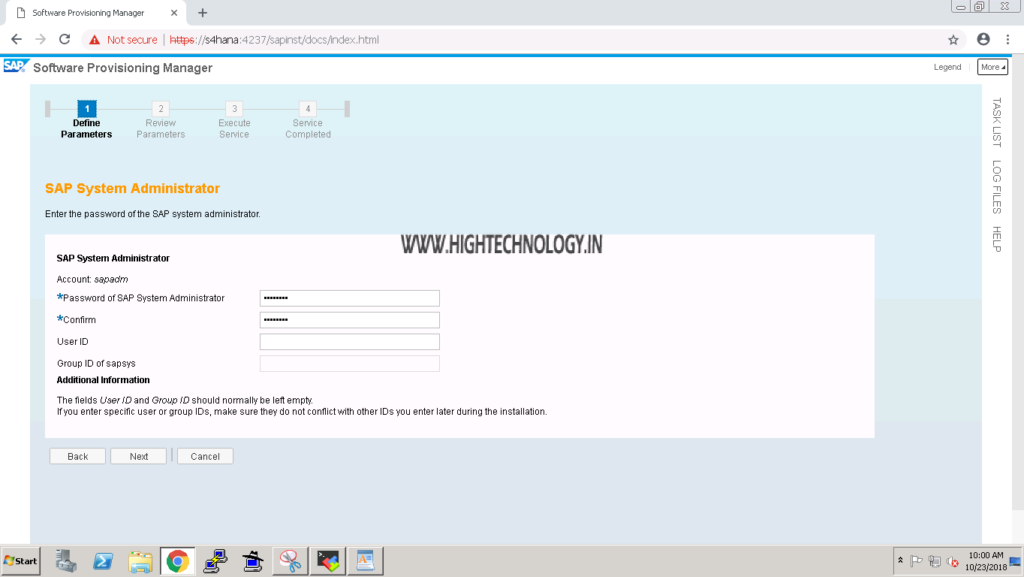
Step8: On next page, enter SAP System Administrator details like: Password for <sidadm>, Group ID, User ID, home directory, and bin shell, and then click on Next.
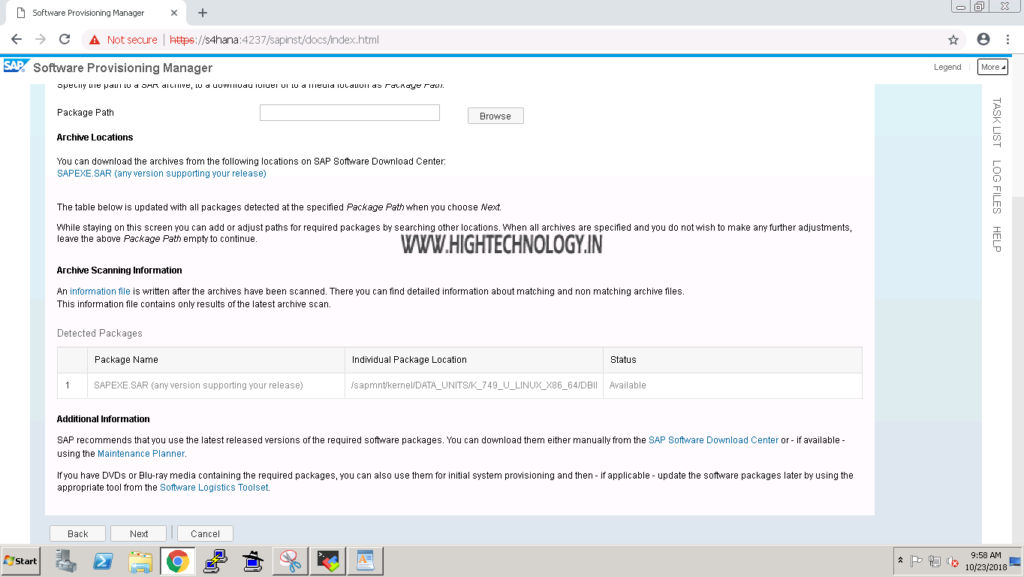
Step9: On next page provide SAPEXE.SAR file location and then click on Next.
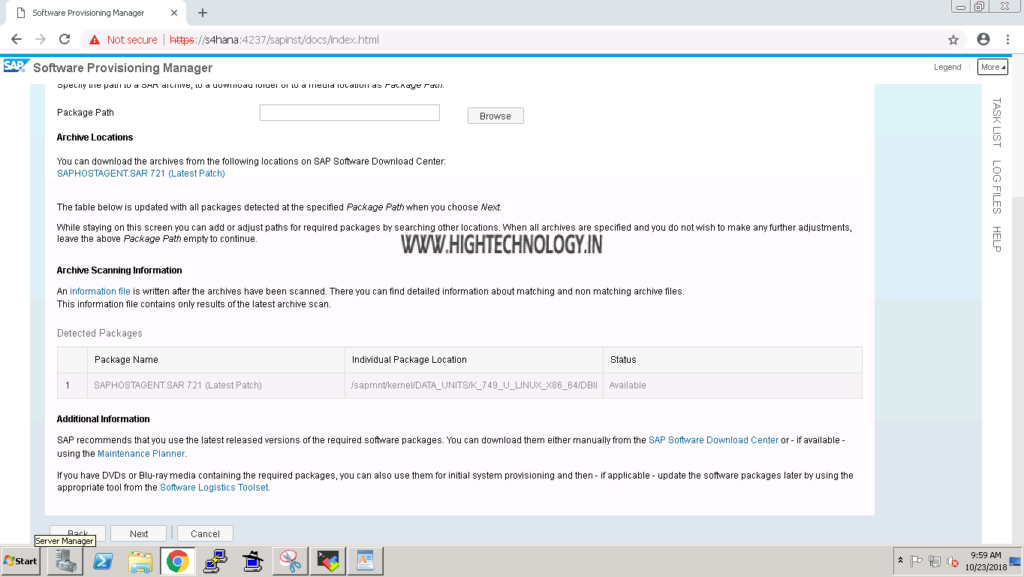
Step10: On next page provide SAPHOSTAGENT.SAR file location and then click on Next.
Step11: On next page provide sapadm password or leave it as default(master password) and then click on Next.
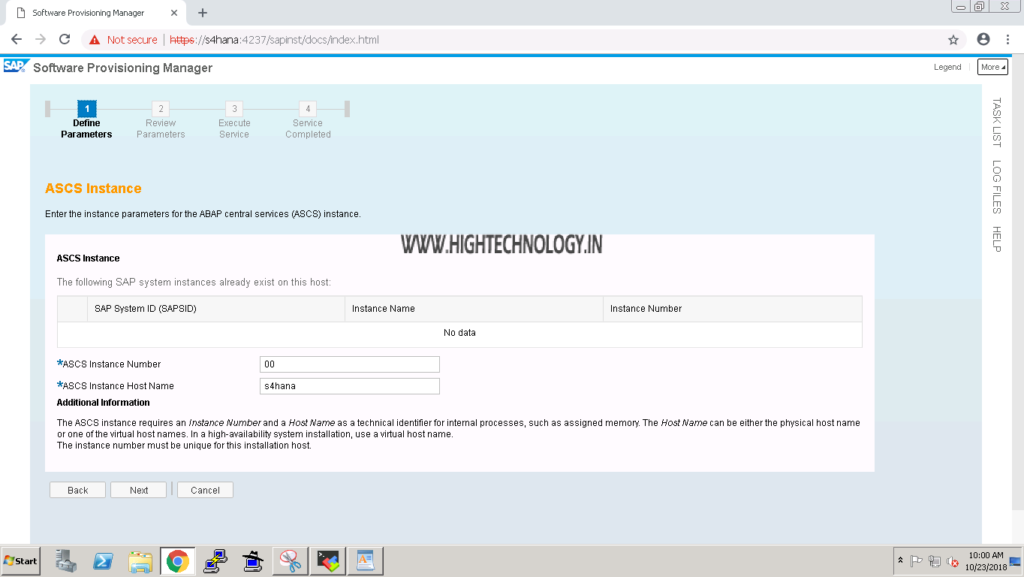
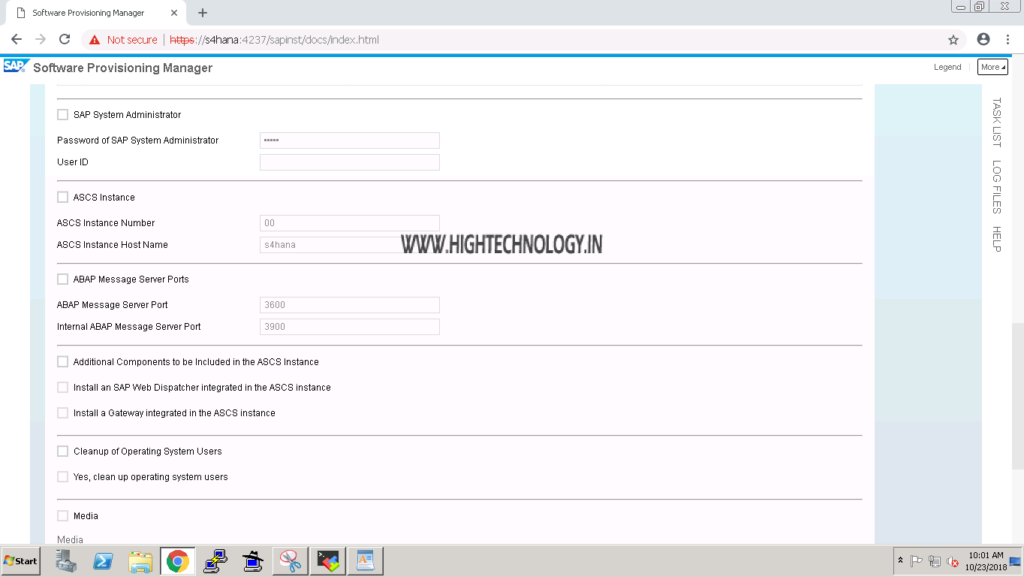
Step12: On next page provide ASCS instance Number and hostname, and then click on Next.
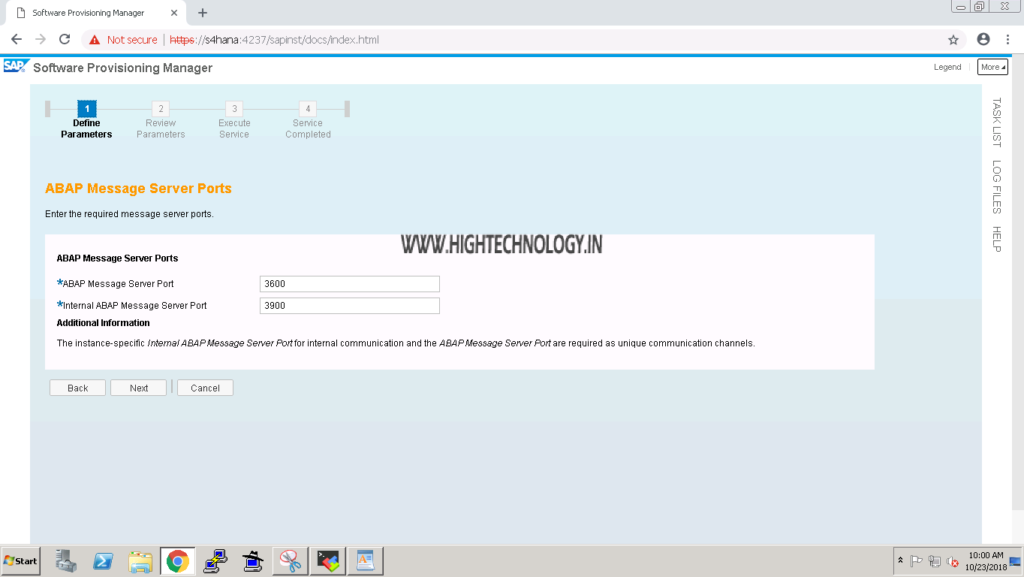
Step13: On next page provide ABAP message server port and internet message server port, and then click on Next.
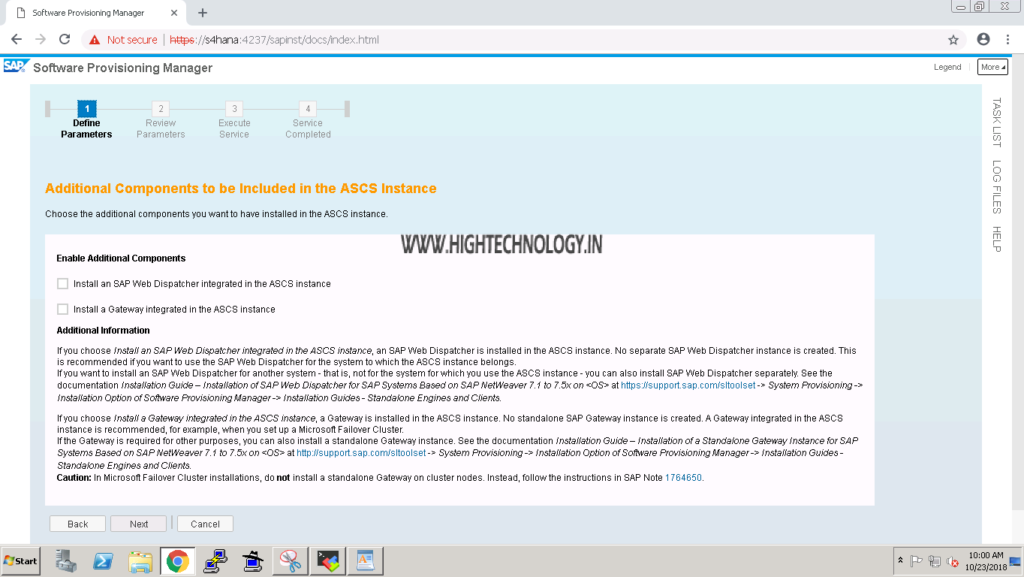
Step14: On next page, check checkbox if you want to enable additional component and click on Next.
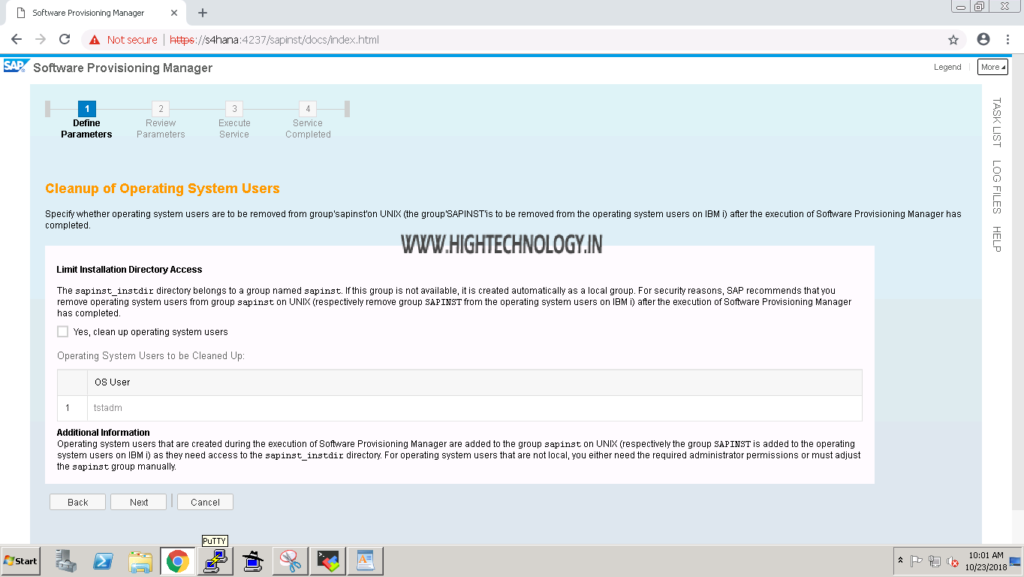
Step15: On next page provide check yes, cleanup operating system user, and then click on Next.
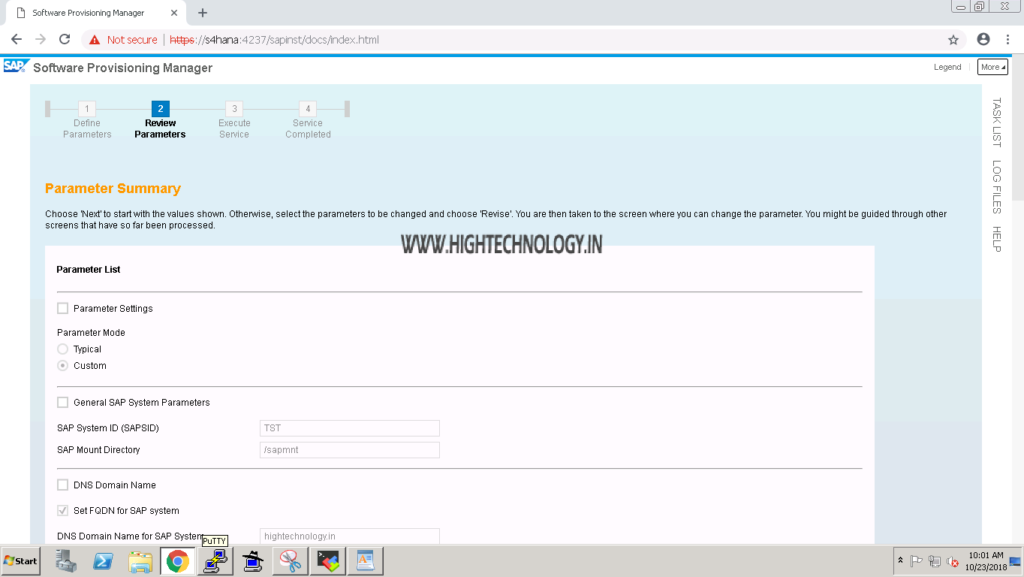
Step16: Review the installation summary and click on Next, It will start installing ASCS instance.
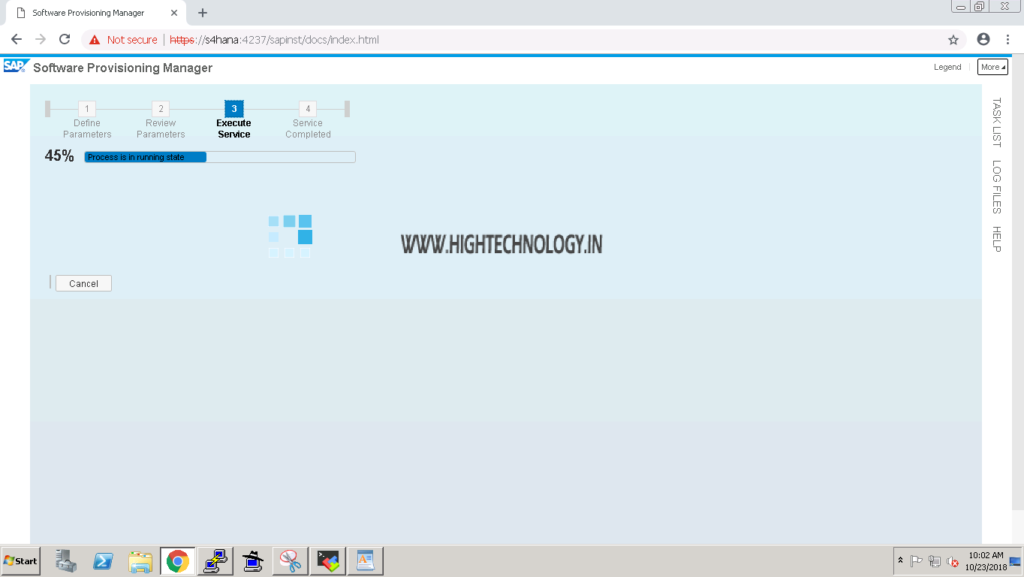
Step17: Once the installation is finished, click on Exit. And we are done with installation of ASCS instance.
On Next Part we will start installation of Primary Application Server Instance.